How to Use Dropbox
The Beginner’s Guide on How to Use Dropbox
You may backup files on your computer and retrieve them from anywhere with Dropbox, a cloud-based service for file storage. The ability to share, collaborate, and read prior iterations of a document are just a few of the numerous great tools that are available. Essentially, you may see Dropbox as a huge digital filing cabinet where you can save all of your critical papers. Dropbox has your back, making it simple to access everything you need from the cloud even if your PC malfunctions or you’re not near your usual computer.
Great, isn’t that right? There’s a good reason why Dropbox currently has 600 million users . You will discover what Dropbox is, how to join up, and what types of unique features make Dropbox a wonderful option for backing up and storing your crucial data in this beginner’s tutorial.
What Is Dropbox? Should You Use It?
“The cloud” has developed over the past several years into one of those tech jargon that is frequently used without anyone truly knowing what it means. Basically, when you upload a computer file to the cloud (a document, photo, etc.), it is saved online in addition to on your computer, so even if your computer crashes, sinks in a lake, or becomes otherwise inoperable, you can still access it. Dropbox employs cloud storage, which spreads out your files among several computer servers all over the world. This is advantageous since it shows that your files have been backed up twice.
You can access Dropbox files from any device since they are stored in the cloud. For instance, without utilising a USB drive or emailing it to yourself, you may save your work presentation on your home computer and then open it on your office computer. Dropbox allows you to access files while on the move and is compatible with desktops, tablets, and even smartphones. Additionally, Dropbox “mirrors” any files you upload, synchronising your local PC files with your cloud-based data. By extension, this means that any changes you make to a file are immediately updated in Dropbox.
If your computer breaks or you unintentionally erase a file, you may quickly restore it from Dropbox, along with any prior versions. Another great Dropbox feature is collaboration. Email attachments might fail spam filters or even end up in the wrong hands when you send files to customers or coworkers. Other times, a large attachment bounces before it reaches its intended destination. Instead of attaching a file to an email, Dropbox allows you to send a link to share a file. Various permissions can be specified to regulate access.
How Do I use Dropbox as a beginner?
Additionally, it implies that you will require a remote location to store all of your work files so that you may access them from anywhere. In this area, Dropbox excels. You must comprehend Dropbox’s operation and the range of possibilities in order to make the most of it. This tutorial will show you how to utilise all of Dropbox’s features if you’re a new user.
What is Dropbox for?
Just to be clear, Dropbox allows you to both store and exchange files. You may always access these files online because they are all backed up in the cloud. Are you prepared to begin?
Getting to Know How to Use Dropbox
To keep copies of their information and save up space on their hard discs, people use cloud storage. However, new users should be aware that uploading items to Dropbox does not instantly erase them from your hard drive. After uploading the files to the cloud, you must erase them from your computer if you wish to do that. However, Dropbox does offer several functionalities that may be used independently.
For instance, changes you make to files you’ve submitted using the desktop app are instantly updated. Additionally, the syncing features allow you to access these files on all of your devices. Even if your machine malfunctions, this method protects your files. You won’t lose your images and other essential papers permanently, for instance, if you store them on the cloud rather than on your hard drive. Even if you believe your computer to be secure, it may nevertheless sustain harm, malfunction, or even be stolen.
Understanding How to Use Dropbox
To back up their information and clear up space on their hard discs, many use cloud storage. New users should be aware that transferring files to Dropbox does not necessarily erase them from your computer’s hard disc. If that’s your goal, when you transfer the files to the cloud, you’ll need to manually remove them from your computer. However, Dropbox does provide helpful automatic functions. For instance, any files you upload via the desktop application get updated instantly whenever you make changes to them.
You may access those files on all of your devices thanks to the syncing capabilities as well. This method safeguards files from any computer-related technical issues you could experience. If your images and other vital papers are kept on the cloud, for example, they won’t be permanently destroyed if your hard drive crashes. Even if you believe your computer is safe, there is always a danger that it might be broken, go out of commission, or even be stolen.
Any file submitted to Dropbox may be downloaded to a new or different device, including a desktop computer and a mobile device. This makes switching to a new system much simpler, especially if you have to start again because your old gadget broke down. When it comes to transferring files, Dropbox provides tremendous capabilities.
By using shareable links and a variety of user permissions, sharing your files with others is a straightforward process. Permitted users can furthermore leave comments and ideas on papers, images, and videos. Dropbox may also be used for basic cloud storage. You can add files to your Dropbox account and only save them in the cloud as long as you use the browser client.
Dropbox Pricing & Account Tiers
By creating a Basic account on Dropbox’s website, you may test it out without paying anything. The 2GB of free storage that Basic offers is plenty if you don’t plan to upload numerous files. The procedure of signing up will be covered in the next section. For personal accounts, Dropbox offers a number of priced solutions. Naturally, you may access more storage and services if your monthly subscription is larger.
The Plus plan costs $119.88 per year, or $9.99 per month (or $11.99 per month if you choose to pay monthly). You have access to 2TB of storage space with that. Additionally, you have access to features that aren’t available in the free plan, such Smart Sync, mobile offline folders, and account rewind (to recover accidentally changed or deleted files). You may upgrade to the Professional plan if you need 3TB of storage. This plan’s yearly cost is $199 ($16.58 per month), and it offers features like file versioning and shared link expiration dates.
Plans from Dropbox are available for both personal and business usage.
How Does Dropbox Work With Smart Sync?
The latter enables “Smart Sync” (see our article on what Dropbox Smart Sync is), which is another significant distinction between the commercial and free Dropbox accounts. To simply clarify, you may designate files you produce on your desktop as “online only” by using Smart Sync. They are available for editing whenever you use your computer, but unless you opt to download them, they won’t be kept locally.
Users can’t save data exclusively in the cloud if Smart Sync isn’t available. This probably won’t be a problem if your vehicle has a lot of internal storage capacity. Paying extra to utilise the Smart Sync option will be money well spent if you frequently use up all of your local storage.
How to Sign Up for a Dropbox Account
To start utilizing Dropbox, you’ll first must create an account. Fortunately, it solely takes a few minutes to do, and you’ll observe the steps beneath to get began.
- Find the “Register” Immediate on the Web siteAfter you have reached the Dropbox web site, choose “sign up” within the top right-hand nook.
- Choose “Create an Account”To create a brand new account, choose the “create an account” possibility.
- Enter Your Private ParticularsYou’ll be prompted to enter your identify, e mail handle and password. (If you wish to preserve your passwords safe, try our decide of one of the best password managers obtainable.) For a barely faster course of, you too can signal as much as Dropbox utilizing your Google account.
- Choose Your PlanOn the subsequent web page, you may be requested to choose the plan you wish to use. In the event you choose to stay to the free plan, choose the choice “or proceed with 2GB Dropbox Primary plan” situated on the backside of the display screen.
Dropbox will ship you e mail affirmation of your account. You’ll need to confirm your e mail handle earlier than you need to use the service.
As soon as the sign-up course of is full, you may be prompted to obtain Dropbox to your laptop. It’s a good suggestion to do that if you wish to routinely sync information out of your laptop to the service.
How to Use the Dropbox Folder on Desktop
Downloading Dropbox to your desktop routinely creates a Dropbox folder. You should use the steps beneath to sync information to this folder.
- Find the Dropbox FolderOpen “finder” and find “Dropbox” in your “favorites” tray.
- Drag and Drop Recordsdata Into Your FolderTo add information, merely drag and drop them into your Dropbox folder. All recordsdata added will probably be synced to your Dropbox account and it is possible for you to to entry them throughout a number of devices.
- Save Recordsdata to Your Dropbox FolderWhen saving a file, you’ll be able to select to reserve it instantly in your Dropbox folder. All information saved to Dropbox will routinely sync to your account.
How to Use Dropbox on Web
Should you favor to not obtain Dropbox to your laptop, you possibly can add information immediately by the online utility. It’s simple to do; simply observe the directions beneath to start backing up your information.
Importing Information
The very first thing you’ll wish to do with Dropbox is add some information.
- Navigate to “Add Information/Folder”Log in to your Dropbox account by way of your internet browser. On the right-hand facet of the house display screen, you’ll see the choice to add a file or folder. Choose the choice you want.
- Choose the FileChoose the file you wish to add and faucet “open.” The file will likely be uploaded to your Dropbox account. You may observe the identical course of to add a folder.
Discovering information on the net utility is easy and takes no time in any respect.
- Choose All InformationOn the right-hand facet of the house display screen, you will see that six choices. To discover a file or folder, faucet “all information.” You may then browse this part to search out the information you need.
- Or Use the Search BarAlternatively, if you realize the title of the file or folder you wish to find, you possibly can sort it into the search bar.
There are a number of methods to share a file or folder by Dropbox. If you’d like an in depth look, take a look at our guide on how to share files with Dropbox. Beneath is a short overview of what you should do to share a file out of your laptop.
- Find the File in Your Dropbox FolderGo to the Dropbox folder in your desktop. Seek for the file you want to share and right-click your mouse. Discover “share” within the dropdown menu and choose it.
- Electronic mail the FileTo e-mail the file entry immediately, add the contact data for the recipient within the “to:” part. Subsequent, click on “share” and entry to the file will likely be despatched on to the individual you chose.
- Generate a Share HyperlinkAs a substitute of emailing your file, you possibly can generate a shareable hyperlink. After choosing “share,” you will note “create hyperlink” on the backside right-hand facet of the window.
- Copy the HyperlinkSubsequent, copy the hyperlink and share it with anybody you want to entry your information.
Use Dropbox to Obtain Information
Let’s say that you just’re on a brand new gadget and also you want entry to a file you saved to Dropbox, however you don’t have the service put in and don’t wish to set up it. As a substitute, your choice is to log in by way of your browser and navigate to the file you wish to obtain.
- Find the FileTo obtain a file onto your laptop from the online utility, first find the file utilizing the search perform as outlined above.
- Choose the File and ObtainChoose the file and faucet the ellipsis. From the dropdown menu, choose “obtain.”
Use Dropbox to Restore Information
Should you by chance delete a file or folder, concern not: you could have 30 days to recuperate it (120 days on Skilled plans). Right here’s what you are able to do to recuperate your information.
- Find Deleted InformationOn the left-hand facet of the house display screen within the internet utility, you will see that “deleted information.” Choose it to maneuver ahead.
- Choose the File You Need to RestoreChoose the file you want to restore and press “restore” on the right-hand facet of the display screen.
Should you would somewhat delete the file utterly, choose “delete completely,” situated beneath the “restore” button.
Use Dropbox to Request Information
File requests will let you invite individuals who don’t have a Dropbox account to add information to yours. Chances are you’ll discover that helpful when you should get information from staff or family members who don’t use the platform. It’s additionally a great way for lecturers to gather information from college students.
- Log in and Find “File Requests”To request a file, log in to your on-line Dropbox account. On the left-hand facet, you’ll see “file requests.” Click on on it to maneuver to the subsequent web page.
- Choose “New Request”Subsequent, choose “new request” on the right-hand facet of the display screen.
- Identify the Folder and Add a DescriptionOn the subsequent web page, you’ll be requested to title the information you’re requesting. For instance, you can name them “birthday photographs” or “tax paperwork.” When you’ve selected a reputation, select the folder you need Dropbox to place them in. Faucet “create” to maneuver ahead.
- Add Contacts to the Shared FolderOn the subsequent web page, you possibly can add the contacts you want to have entry to the folder. You may both ship the request by way of e-mail, or copy and paste the shareable hyperlink and manually ship it to them.
Send and Receive Files
You may download every file you post to Dropbox to a new or different device, such a computer or phone. This makes setting up a new system lot simpler, especially if your previous one broke and you had to start from scratch. Dropbox does a great job of transferring files. Accessing your files is made simple for others thanks to sharing links and a range of user rights.
On items including papers, images, and videos, users who have been given access can also provide comments and recommendations. Simply using Dropbox to save data on the cloud is another option. As long as you use the online client, you may add files to your Dropbox account and exclusively keep them in the cloud. (We have a tutorial if you need help with Dropbox not synchronising.
Keeping your files in sync
The initial step in the procedure is to sync your files. By syncing, you ensure that the material on all of your devices and in the cloud is same. This implies that the most current version of a file you are working on at home will immediately sync to your Dropbox account and be accessible whenever and wherever you need it. You may choose which files and folders to sync, and the procedure is automated. These changes take place automatically, thus syncing doesn’t require any action on your part.
Pricing and Account Tiers for Dropbox
You may test it out for free by creating a Basic account on Dropbox’s website. If you don’t intend to upload many files, the 2GB of free storage that comes with Basic should be plenty. We will discuss how to join up in the section that follows. For personal Dropbox accounts, there are a number of premium choices. Unsurprisingly, you get greater storage capacity and functionality with a higher monthly payment.
The annual cost of the Plus plan is $119.88, or $9.99 per month. The cost is $11.99 per month if you choose to pay in that manner. You can store up to 2TB of data with that. Additionally, you get access to paid-for services like Smart Sync, mobile offline folders, and account rewind (to recover accidentally changed or deleted files). To acquire 3TB of space, upgrade to the Professional plan. File versioning and links that expire after a specified period of time are included in this $199/year ($16.58/month) package.
 Dropbox provides multiple options that may be utilised for both personal and commercial requirements.
No need to jump from app to app
Creating and sharing material across the cloud is one of the finest features of Dropbox. This holds true whether you are working on a G Suite or a Microsoft Office file, for instance. You are not required to move between apps. You may configure Dropbox such that it handles the storage and management of all of your content.
Take charge of options for sharing
Regardless of the type of files you save with Dropbox, you can control who has access to them and how much editing power they have. You could be content for someone to simply see a file without having the ability to make any changes to it. Sending files as email attachments is far more difficult than sharing them. Simply decide if you want to share it so that people can only view it or allow them to edit it. Additionally, you may collaborate and provide comments, making it simple to complete a project without sending files via email and waiting for them to be opened.
Make safety your top priority.
Dropbox has excellent levels of security features and procedures, making it even more versatile and user-friendly than when it was first created. By selecting a solid, distinctive password, you may strengthen your defences even more. Utilizing the option for multi-factor authentication would also be shrewd. You will need to sign in using your regular sign-in credentials and a six-digit security code to do this, which provides an additional degree of protection. Once you understand how Dropbox functions, you’ll see how handy and adaptable it can be to support your ability to work swiftly and securely from any location.
Signing Up for a Dropbox Account
The procedure of creating a Dropbox account is simple. You will be given the option to select between the free and premium versions when you initially register an account. Dropbox Basic, the free version of the service, offers 2 GB of storage. This is plenty of space for the majority of personal users. Simply click “sign up for free” on the homepage to begin going.
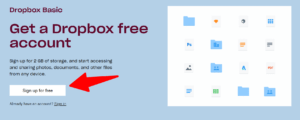 This will direct you to a page where you may create an account and enter your name, email, and password. You need to install the Dropbox software on your computer in order to utilise Dropbox. The page for creating an account has a download option. Dropbox will start downloading to your computer as soon as you click “download the software.”
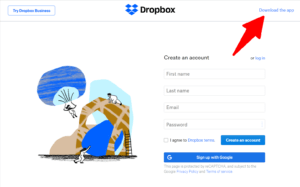 You can also download the Dropbox mobile app for your smartphone and sign in using the same account you use for Dropbox on your computer if you want to view your files from there. The wonderful thing about Dropbox is that you can read files on your phone since all the contents you upload from your PC will appear in the mobile app. Additionally, Dropbox has a corporate edition with three different package options.
For bigger businesses that require licence for a large number of users, there is also an enterprise edition available. The cost of the paid business plans varies depending on how many users and how much storage space are needed. The “regular” plan, for instance, costs $15 per month per user and includes 5 TB (5,000 terabytes) of storage. The “professional” plan, which only allows for one user and costs $19.99 per month, comes with 3 TB of storage.
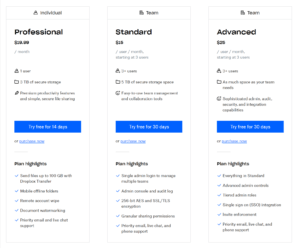
Getting Started with Your New Dropbox Account
With a little bit of experience, most computer users will be able to master Dropbox’s user-friendly interface. You may drag files into the open Dropbox app or upload them from your Dropbox account once you’ve joined up. Your data will be backed up in the cloud as well as locally on your PC. You’ll notice a Dropbox icon on your desktop once you’ve downloaded the Dropbox software and created an account. After installation, Dropbox ought to start up automatically. If not, you may access Dropbox by double-clicking the icon on your computer.
Dropbox will ask you if you want your files to be local or “online only” the first time you launch the programme. The majority of individual users will choose the local configuration because the online only option is a premium service. You are now prepared to begin adding files to Dropbox and preserving your crucial papers there. But Dropbox does more than just that. Let’s look at some of its most well-liked and practical features.
Using Feature #1: Uploading Files
You have a few choices for uploading files using Dropbox. The free (Basic) Dropbox version does not immediately sync new files you generate on your computer’s local hard drive to the programme, which should be noted beforehand. However, a few of commercial versions have this capability. You can drag and drop files into the app or upload them from your Dropbox account if you’re using the Basic edition. Let’s first examine the drag and drop technique. Here is a step-by-step tutorial to get you going.
Technique #1
- Open the Dropbox app in your laptop. It is best to see the principle Dropbox dashboard.
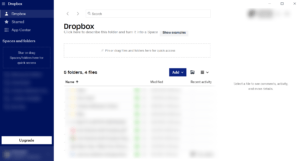
- If you wish to place a file in an present Dropbox folder, click on on that folder. If not, you may merely drag and drop a file anyplace on the principle dashboard, and your file will routinely seem on the finish of the checklist of folders. You can too create a brand new folder by clicking “add” after which selecting “folder” from the dropdown menu.
- Discover the file or merchandise out of your arduous drive you wish to transfer into Dropbox. Click on the merchandise and drag it into Dropbox. Now it exists in your native laptop and Dropbox.
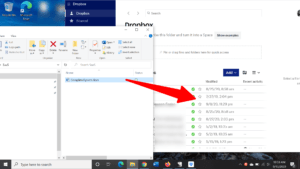 Technique #2 You can too add recordsdata out of your account at Dropbox.com. This can be a helpful technique for instances while you’re away out of your common laptop and wish to save lots of a file so you may entry it later.
- Go to Dropbox.com and login to your account. It is best to see your account homepage.
- Click on “add recordsdata” on the best aspect of the web page.
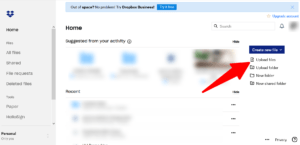
- Choose the recordsdata you wish to add.
- Click on “open.”
- Choose “add” to add the recordsdata to a folder inside Dropbox. You can too create a brand new folder and add your recordsdata there.
Utilizing Function #2: Sharing Information
Dropbox additionally makes it simple to share recordsdata with different folks with out the necessity to use electronic mail attachments. There are a pair simple methods to do that. The primary technique is to ship the file to your recipient by the Dropbox system.The opposite is to easily share the hyperlink to your Dropbox file with the recipient.
Technique #1: Ship the File By Dropbox To ship a file or folder by Dropbox, go to your Dropbox account and login. Then choose the file or folder you wish to ship and click on “share.” 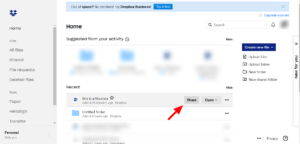 This can generate a pop-up that means that you can enter the recipient’s electronic mail. You can too change the settings to manage whether or not the recipient has permission to edit or touch upon the file or folder.
 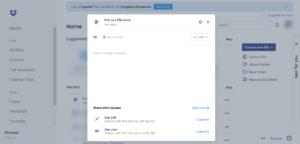 When you enter a reputation or electronic mail deal with, a blue “share” button will seem. Click on it to ship your file or folder to your recipient. You’ll be able to ship to a number of folks, and there’s an choice to connect a message together with the file or folder.
Technique #2: Ship a Hyperlink You can too give somebody entry to a folder or file in Dropbox by sending them a direct hyperlink. To do that, go into your Dropbox app or account and choose the folder or file you wish to share. As soon as you choose it, a preview will seem on the best aspect pane. Click on “share” then click on “copy hyperlink.”
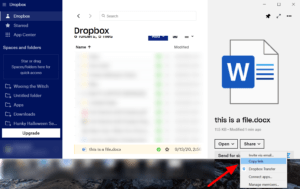 Now you may have copied the hyperlink and you may paste it into an electronic mail, Slack or Skype chat, or some other communication system.
If you work on a team or need to collaborate with someone on a project, Dropbox gives you the ability to create a shared folder so everyone involved can access files from anywhere. To create a shared folder, login to your Dropbox account and click “new shared folder.” A pop-up box will appear asking you to create a new shared folder or make an existed folder shared. 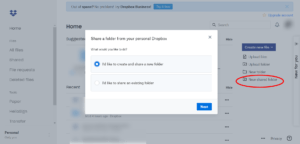 After you make your selection, click “next.” Another pop-up will appear asking you to name your shared folder. If you choose to share a folder that already exists, the pop-up will show you a list of all your existing folders and prompt you to highlight the one you want to make a shared folder. Next, you enter your recipients’ name, just as you would for sharing an individual file or folder.
When you’re done entering the name or email of everyone on the team or project, enter an optional message and click “send.” Dropbox will send the notification to your recipients. If they already have Dropbox, they can add the file or folder to their own Dropbox account. If they don’t have Dropbox installed, they will need to install it before they can access the files.
Using Feature #4: Enabling Two-factor Authentication
Dropbox has come beneath scrutiny for safety points, which is likely one of the most frequent criticisms levied in opposition to it. In 2016, for instance, cyber attackers exploited 68 million user accounts. Some tech consultants recommend ramping up your safety by investing in third-party encryption software program. It ought to be famous, nonetheless, that Dropbox already makes use of 256-bit encryption for saved recordsdata and 128-bit encryption for recordsdata in switch. Additionally, whereas some third-party encryption software program is free, the plans with essentially the most options and safety value round $50 a 12 months for a person and round $100 for a enterprise.
Happily, Dropbox added options to assist customers preserve their information safer following the 2016 hack. One strategy to safe your account is by enabling two-factor authentication. Two-factor authentication combines two types of verification on your account. For instance: a password and a one-time use PIN or numerical code despatched to you through textual content or electronic mail. To allow two-factor authentication on your Dropbox account, login to your account and click on your profile photograph. From there, click on “settings” after which the “safety” tab.
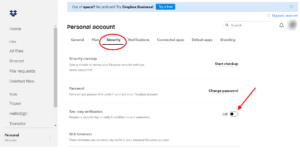 Next, switch the “off” button for “two-step verification” to “on.” For security reasons, Dropbox will prompt you to enter your password again after which you will be guided through the process of turning on two-factor authentication for your account. Two-factor authentication is one of the finest ways, in the opinion of computer experts, to safeguard your papers and files against hacker assaults and data breaches. You may make your data more secure by activating it for your Dropbox account.
Conclusion – How to Use Dropbox
It’s easy to backup your data and make them available from anywhere using Dropbox. Dropbox is one of the most well-known cloud storage programmes available because to its huge storage and strong features in the free edition. Dropbox is a good option to consider whether you want to backup your work, work with a team, or access your files on the road.
If you upload files to Dropbox, you won’t have to be concerned about losing them if your computer malfunctions. Additionally, it is a fantastic platform for exchanging files and producing new papers. It is a good alternative for folks who wish to view their data on all of their devices because of its sync features. This Dropbox lesson should have given you a better understanding of its capabilities as well as instructions on how to utilise them. Visit our best online backup guide if you’re still looking for the cloud backup solution that’s perfect for you. Did you find this information useful? Do you believe Dropbox to be your best option? Please let us know. Comment below with your thoughts and let us know. Gratitude for reading.


