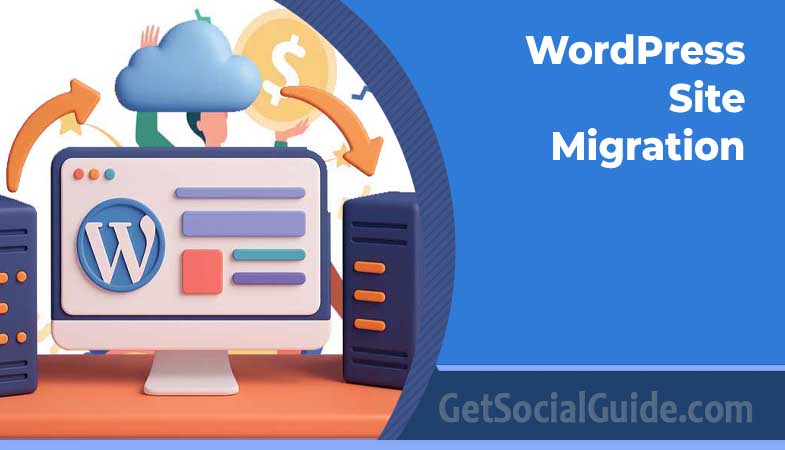
WordPress Site Migration: The Ultimate Expert Guide to Moving Your Website Without Losing Data, Rankings, or Sleep
This exhaustive, authoritative 2026 WordPress site migration guide synthesizes over fifteen years of hands‑on migration experience, thousands of successful website transfers, and cutting‑edge best practices into a comprehensive roadmap that serves both complete beginners and seasoned WordPress developers. By the conclusion of this deep‑dive article, you’ll possess the knowledge, confidence, and technical competence to execute flawless WordPress site migrations using manual methods, automated plugin solutions, or professional migration services—all while preserving your hard‑earned SEO rankings, maintaining zero customer‑facing downtime, and protecting every byte of your valuable website data.
We’ll explore the complete WordPress migration ecosystem: understanding core architectural components, strategic business justifications for migration, meticulous pre‑migration preparation protocols, detailed step‑by‑step manual migration procedures, plugin‑based automation workflows, comprehensive post‑migration testing and optimization, common pitfalls with proven avoidance strategies, expert troubleshooting techniques, and answers to the most frequently asked migration questions from the WordPress community.
Pro Tip: The Triple‑Backup Golden Rule
Before initiating any WordPress migration process, create at least three completely independent backups stored in geographically separate locations. This redundancy strategy ensures bulletproof data recovery regardless of migration complications. Store backup one on your local development machine or external hard drive, backup two in cloud storage services like Google Drive, Dropbox, or Amazon S3, and backup three with your current hosting provider’s automated backup system. This triple‑layer protection has saved countless websites from permanent data loss when single backup methods failed during critical recovery operations.
Understanding WordPress Site Migration: Core Concepts, Architecture & Components
WordPress site migration constitutes the comprehensive technical process of transferring your entire WordPress installation—encompassing all system files, extensive database content, uploaded media assets, installed themes and plugins, custom code implementations, and critical configuration settings—from one server hosting environment to another destination server or hosting provider. This complex operation involves multiple interdependent technical components functioning in precise coordination to ensure your website maintains identical functionality, appearance, and data integrity in its new hosting location.
Unlike simple file copying or basic content transfer, professional WordPress migration requires deep understanding of how WordPress architecture integrates PHP application code, MySQL database structures, Apache/Nginx web server configurations, DNS domain name systems, and various third‑party service integrations. Each component must be carefully handled, properly configured, and thoroughly tested to guarantee seamless operation post‑migration.
WordPress Architecture: Two Fundamental Migration Components
Every WordPress website consists of two primary technical components that must migrate together as an integrated system:
1. WordPress File System (Application Layer)
Your WordPress file system contains all static and executable code that powers your website:
- WordPress Core Files: The foundation WordPress application located in root directory including wp‑admin (administration interface), wp‑includes (core functions and libraries), and wp‑content (customizations and media).
- Theme Files: Complete design templates, stylesheets (CSS), JavaScript functionality, PHP template files, and theme‑specific functions defining your website’s visual appearance and layout structure.
- Plugin Directories: All installed plugin folders containing PHP code, JavaScript libraries, CSS styling, and plugin‑specific assets that extend WordPress functionality.
- Uploaded Media Library: Images (JPEG, PNG, GIF, WebP), videos (MP4, AVI), audio files (MP3, WAV), PDF documents, and other downloadable files organized in date‑based folder structure within wp‑content/uploads/.
- Configuration Files: Critical wp‑config.php database connection file, .htaccess server directives (Apache), nginx.conf rules (Nginx servers), and robots.txt search engine instructions.
- Custom Code Implementations: Child theme customizations, mu‑plugins (must‑use plugins), custom page templates, and specialized functionality unique to your website.
2. MySQL Database (Data Layer)
Your WordPress database stores all dynamic content and configuration data across multiple interrelated tables:
- Content Tables: wp_posts (posts, pages, custom post types, revisions), wp_postmeta (custom fields and metadata), wp_comments (user comments and trackbacks), wp_commentmeta (comment‑related metadata).
- User Management: wp_users (account credentials, email addresses, registration dates), wp_usermeta (user profiles, preferences, capabilities, custom user data).
- Taxonomy Structure: wp_terms (categories, tags, custom taxonomies), wp_term_taxonomy (taxonomy assignments), wp_term_relationships (content‑taxonomy associations).
- Site Configuration: wp_options (global settings, plugin configurations, theme options, widget assignments, permalinks, site URLs).
- Additional Tables: wp_links (blogroll links – legacy), plugin‑specific tables (WooCommerce products, membership data, form entries, SEO settings), custom tables created by specialized plugins or themes.
The standard WordPress installation creates 12 core database tables with “wp_” prefix by default. However, mature WordPress websites commonly accumulate 50‑200+ tables through plugin installations, custom functionality implementations, and historical data accumulation over years of operation.
Common WordPress Migration Scenarios: When & Why to Migrate
WordPress site migrations occur under diverse circumstances, each requiring tailored approaches:
Host‑to‑Host Migration (Most Common)
Transferring your WordPress installation from one web hosting provider to another while maintaining the identical domain name. Primary motivations include escaping poor hosting performance (slow load times, frequent downtime), upgrading to superior infrastructure (managed WordPress hosting, VPS servers, dedicated servers), reducing hosting costs without sacrificing quality, accessing better customer support and technical assistance, or implementing enhanced security measures and compliance requirements.
Domain Name Migration
Moving your WordPress site to a completely different domain name while potentially keeping the same hosting provider. Common scenarios include business rebranding initiatives, merging multiple websites under unified domain, retiring old domains for SEO consolidation, launching international versions with country‑specific domains, or correcting initial domain selection mistakes.
Local Development to Live Production
Deploying WordPress sites developed on local machines (using MAMP, XAMPP, Local by Flywheel, or Docker environments) to live production servers accessible worldwide. This workflow enables offline development, extensive testing without affecting live users, and controlled deployment of major redesigns or functionality changes.
Staging to Production Deployment
Pushing tested changes from isolated staging environments to live production websites. Modern WordPress development workflows utilize staging sites for testing plugin updates, theme modifications, content changes, and new features before exposing them to real visitors, minimizing risk of breaking live websites.
Server‑to‑Server Migration
Moving between different physical or virtual servers within the same hosting provider’s infrastructure. Necessary when upgrading hosting plans, relocating to different data centers for improved regional performance, or migrating from shared hosting to VPS/dedicated servers for better resource allocation.
WordPress Multisite Network Migration
Transferring complex WordPress multisite installations managing multiple interconnected websites through single WordPress installation. Requires specialized handling of network‑wide settings, site‑specific configurations, domain mapping complexities, and shared resources across network sites.
HTTP to HTTPS Security Migration
Implementing SSL/TLS certificates while migrating to enforce HTTPS encryption site‑wide. Modern search engines heavily favor secure websites, making HTTPS migration simultaneously a security enhancement and SEO improvement initiative requiring careful URL updating throughout database and files.
Server Technology Stack Migration
Transitioning between different server software configurations such as Apache to Nginx, older PHP versions to modern PHP 8.x, MySQL to MariaDB, or implementing advanced caching systems (Redis, Memcached, Varnish). These migrations optimize performance but require careful compatibility verification.
WordPress Migration Process Architecture: 8 Critical Phases
Professional WordPress migrations follow systematic eight‑phase methodology ensuring comprehensive coverage:
- Assessment & Planning Phase: Comprehensive site auditing, migration strategy selection, risk identification, timeline establishment, and stakeholder communication.
- Comprehensive Backup Phase: Creating redundant, verified backups of all files and complete database using multiple independent methods.
- Data Export & Packaging Phase: Systematically packaging WordPress files into compressed archives and exporting database as portable SQL dump files.
- Destination Environment Preparation: Configuring target server infrastructure, creating fresh database instances, verifying technical requirements compatibility.
- Data Transfer & Import Phase: Securely transferring packaged data to destination server and importing database content into new database instance.
- Configuration & Integration Phase: Updating wp‑config.php database credentials, adjusting server configurations, reconnecting third‑party services and APIs.
- Testing & Validation Phase: Exhaustive functionality testing, performance benchmarking, security verification, and cross‑browser compatibility confirmation.
- DNS Switchover & Monitoring Phase: Updating domain DNS records to point to new server, monitoring DNS propagation globally, watching for post‑migration issues.
Each phase carries specific technical requirements, potential failure points, and critical success factors. Complexity multiplies exponentially when dealing with enterprise‑scale websites (exceeding 50GB total size), heavily customized WordPress installations with proprietary code, active WooCommerce e‑commerce stores processing real‑time transactions, membership sites managing thousands of subscriber accounts, or multilingual websites with complex content relationships.
Technical Prerequisites for Migration Success
Destination server environments must meet or exceed these technical specifications for trouble‑free WordPress operation:
| Component | Absolute Minimum | Recommended Standard | Optimal Performance |
|---|---|---|---|
| PHP Version | 7.4 (EOL soon) | 8.1 LTS | 8.2 or 8.3 |
| MySQL/MariaDB | 5.7 / 10.3 | 8.0 / 10.6 | 8.1+ / 10.11+ |
| PHP Memory Limit | 256MB | 512MB | 1024MB (1GB) |
| Max Execution Time | 300 seconds | 600 seconds | 900+ seconds |
| Upload Max Filesize | 128MB | 256MB | 512MB+ |
| POST Max Size | 128MB | 256MB | 512MB+ |
| Available Disk Space | 2x current site size | 3x current site size | 5x+ for growth |
| RAM (Server Memory) | 1GB | 2‑4GB | 8GB+ |
| CPU Cores | 1 core | 2‑4 cores | 4+ cores |
Version compatibility between source and destination server environments dramatically impacts migration success rates. According to WordPress.org telemetry data and hosting provider statistics, migrations between servers with mismatched PHP major versions (e.g., PHP 7.4 to PHP 8.2) account for approximately 28% of all reported migration failures, primarily due to deprecated function calls, syntax changes, and incompatible plugin code requiring updates before successful operation on newer PHP versions.
Beyond basic version requirements, critical PHP extensions must be available and enabled: GD Library or ImageMagick for image processing, cURL for external API communications, mbstring for multibyte string handling, XML/XMLReader for feed parsing and API responses, OpenSSL for secure connections, and MySQLi or PDO MySQL for database operations. Missing extensions cause subtle functionality breakdowns that may not manifest immediately but create problems during specific operations post‑migration.
Critical Warning: The GUID Field Immutability Rule
Never, under any circumstances whatsoever, modify the GUID (Globally Unique Identifier) column in your wp_posts database table during WordPress migration or URL replacement operations. The GUID represents a permanent, immutable identifier for each individual post and page that WordPress uses internally for tracking content across its lifetime—this value must remain absolutely unchanged even when site URLs, domain names, or permalink structures are updated.
Modifying GUID values causes catastrophic issues: corrupted RSS feeds returning errors to subscribers, search engines confused by duplicate content signals lowering rankings, WordPress internal references breaking for trackbacks and pingbacks, and violation of fundamental WordPress core architectural principles. Many automated search‑and‑replace tools and database modification scripts mistakenly alter GUIDs by default—you must explicitly configure these tools to exclude the ‘guid’ column from all find‑and‑replace operations. Professional migration tools like Better Search Replace plugin, WP‑CLI search‑replace command, and Search Replace DB script automatically protect GUID integrity when properly configured.
Strategic Pre‑Migration Planning: The Foundation of Success
The single most important determinant of migration success happens before you move a single file. According to migration experts at WP Engine and Kinsta, 65% of migration failures stem from inadequate planning and preparation. This section expands on the critical preliminary steps that most guides gloss over, giving you a comprehensive framework for success.
Comprehensive Site Audit: What You’re Actually Moving
Before planning your move, you need a complete inventory. A thorough site audit should document:
- Technical Inventory: List all active plugins (with version numbers), your theme (and any child theme), WordPress core version, and any custom code in mu‑plugins or custom plugins. Use tools like WP Staging’s Site Audit or manually create a spreadsheet.
- Performance Baseline: Record current performance metrics using Google PageSpeed Insights, GTmetrix, or your hosting control panel. Document server response time, Time to First Byte (TTFB), and Largest Contentful Paint (LCP). This gives you benchmarks to compare post‑migration.
- SEO Health Check: Use Screaming Frog SEO Spider or SEMrush to crawl your site and document: all indexed URLs, current meta titles and descriptions, internal link structure, existing 301 redirects, and sitemap structure.
- Third‑Party Integrations: List all external services—payment gateways, email marketing platforms, CDNs, analytics tools, and APIs. Note any hardcoded URLs or IP addresses that might need updating.
- Custom Functionality: Document any bespoke features, custom post types, or specialized database queries that might have unique migration requirements.
Choosing Your Migration Method: A Decision Framework
With your audit complete, you can make an informed decision about which migration approach best suits your needs:
| Method | Best For | Technical Skill Required | Time Investment | Risk Level | Cost |
|---|---|---|---|---|---|
| Manual Migration (FTP + phpMyAdmin) | Small sites, learning purposes, full control needs | Advanced | 4‑8 hours | High | $0 |
| Migration Plugin (Duplicator, All‑in‑One WP Migration) | Medium sites, most typical migrations | Intermediate | 1‑3 hours | Medium | $0‑$100+ |
| Hosting‑Provided Migration | Users new to a managed host, time‑constrained | Beginner | 1‑2 hours coordination | Low | Often free with hosting |
| Professional Service | Enterprise sites, complex migrations, zero‑downtime requirements | None (they handle it) | Minimal supervision | Very Low | $300‑$2000+ |
Pre‑Migration Cleanup: Reducing Migration Complexity
One often overlooked strategy is cleaning your site before migration. This reduces the data transfer size and minimizes potential compatibility issues:
- Database Optimization: Use a plugin like WP‑Optimize to clean up post revisions, spam comments, transient options, and trashed items. The average WordPress database contains 30‑40% unnecessary data that can be safely removed.
- Media Library Audit: Remove unused images, duplicate files, and overly large media files. Consider converting images to modern formats like WebP for better performance on your new server.
- Plugin & Theme Review: Deactivate and delete plugins you’re not using. According to Wordfence security research, 60% of WordPress vulnerabilities come from plugins—reducing your plugin footprint improves security and performance.
- Log File Cleanup: Check for and remove large log files in your wp‑content directory that accumulate over time, sometimes consuming gigabytes of space.
Pro Tip: The Migration Timing Strategy
Schedule your migration during your site’s lowest traffic period, typically between 1 AM and 5 AM in your primary audience’s time zone. Use Google Analytics to identify your specific low‑traffic window. For global sites, target Sunday morning UTC when traffic is typically lowest worldwide. This minimizes the impact of any unforeseen issues and gives you maximum working time before business hours resume. Also check that no major marketing campaigns, product launches, or seasonal events are scheduled for immediately after your planned migration date.
Step‑by‑Step Manual WordPress Migration
For those who want complete control or need to understand what’s happening “under the hood,” manual migration remains a valuable skill. Here’s the expanded, detailed process:
Phase 1: Backup Everything (Again)
Even though you already created your triple backup, create one final, fresh backup immediately before beginning the manual process. This captures any last‑minute content changes.
- File Backup via FTP: Use FileZilla or another FTP client to download your entire WordPress directory to your local machine. For large sites, compress the files first using your hosting control panel’s file manager to create a .zip or .tar.gz archive.
- Database Export: Access phpMyAdmin through your current hosting control panel. Select your WordPress database, click “Export,” choose “Custom” method, select all tables, and set format to SQL. Crucial tip: Under “Object creation options,” check “Add DROP TABLE / VIEW / PROCEDURE statement” and “IF NOT EXISTS.” This prevents import errors if tables already exist at the destination.
Phase 2: Prepare the Destination Server
Before uploading anything, properly configure your new hosting environment:
- Create Database and User: In your new hosting control panel, create a new MySQL database and user with full privileges. Document the database name, username, password, and host (usually “localhost”).
- Verify Server Specifications: Confirm PHP version (8.1+ recommended), MySQL/MariaDB version, and that necessary PHP extensions are enabled (curl, gd, mbstring, xml).
- Upload WordPress Core Files: For a clean start, download the latest WordPress version from WordPress.org and upload it to your new server’s root directory (usually public_html). This ensures you’re starting with fresh, uncorrupted core files.
Phase 3: Transfer Your Site Data
- Upload Your Files: Via FTP, upload your wp‑content folder from your backup to the new server, overwriting the empty one from the fresh WordPress install. Also upload any custom files like .htaccess, robots.txt, or wp‑config.php (temporarily—we’ll update it later).
- Import Your Database: In the new server’s phpMyAdmin, select the database you created, click “Import,” choose your SQL file, and set character set to “utf8mb4_general_ci.” For large databases, you may need to increase the import file size limit or use command‑line MySQL import:
mysql -u username -p database_name < backup.sql.
Phase 4: Critical Configuration Updates
This is where most manual migrations fail—incorrect configuration:
- Update wp‑config.php: Edit this file on your new server with the correct database credentials (name, user, password, host). Also update the authentication keys and salts by generating new ones from the WordPress.org secret key generator.
- Handle Serialized Data: This technical hurdle trips up many. When WordPress stores data like widget positions or theme options, it “serializes” it—including string lengths. If you simply do a find/replace for your old domain to new domain in the SQL file, you’ll break these serialized strings. Solution: Use the command line tool WP‑CLI with the command:
wp search-replace 'olddomain.com' 'newdomain.com' --all-tables --dry-run(remove--dry-runto actually execute after verifying changes). - Update Site URL: If you’re changing domains, you must also update the WordPress and Site URL settings in the database. Using WP‑CLI:
wp option update siteurl 'https://newdomain.com'andwp option update home 'https://newdomain.com'.
Phase 5: Test Before DNS Switch
Before changing your domain’s DNS, test your migrated site on the new server:
- Temporary Access Methods: Edit your local computer’s hosts file to point your domain to the new server’s IP address, or use a temporary URL provided by your new host.
- Comprehensive Testing Checklist:
- Navigate through all major pages and posts
- Test forms (contact forms, registration forms)
- Verify images and media load correctly
- Test functionality of all plugins
- Check that internal links work
- Test on different browsers and mobile devices
- Verify admin area functionality
Plugin‑Based Migration: The Modern Standard
For most users, migration plugins offer the best balance of ease and reliability. Let’s examine the top contenders and their optimal use cases:
Duplicator Pro: The Professional’s Choice
With over 30 million downloads, Duplicator is arguably the most robust migration plugin available. Its “package” system creates an installer.php file and an archive of your entire site.
Step‑by‑Step Duplicator Process:
- Create Package: Install Duplicator on your source site, go to Duplicator > Packages > Create New. Run the scanner to check for potential issues, then build the package.
- Download Package Files: Download both the installer.php and the archive.zip file to your local computer.
- Upload to New Server: Upload both files to your new server’s root directory (usually public_html).
- Run Installer: Navigate to yourdomain.com/installer.php in your browser. Follow the step‑by‑step wizard:
- Accept terms and run deployment
- Enter new database credentials
- Update the new site URL if changing domains
- Test the site before finalizing
- Finalize Migration: Once testing is complete, click “Admin Login” to access your new site’s dashboard, then go to Duplicator > Tools > Cleanup to remove installation files.
All‑in‑One WP Migration: Simplicity Personified
Known for its dead‑simple interface, All‑in‑One WP Migration uses a “drag and drop” approach perfect for smaller to medium sites.
Key Considerations:
- File Size Limitations: The free version limits exports to 512MB. For larger sites, you’ll need the premium extension.
- Streamlined Process: Export creates a single .wpress file. On the destination site, install the plugin, go to Import, and upload your file.
- Direct Server‑to‑Server Option: Premium version allows direct transfer between sites without downloading to your computer first.
Migrate Guru: The Hosting‑Agnostic Solution
Developed by the team behind BlogVault backup service, Migrate Guru offloads the migration processing to their servers, making it ideal for large sites that might exceed your hosting resource limits.
Unique Advantages:
- No Server Load: Since migration happens on Migrate Guru’s servers, it won’t slow down your site during the process.
- Handles Large Sites: Successfully migrates sites up to 1TB in size.
- Automatic Replacement: Handles URL and file path replacements automatically, including serialized data.
Hosting‑Provided Migration Services
Most premium WordPress hosting companies (WP Engine, Kinsta, Flywheel, SiteGround) offer free migration services for new customers. These services vary in quality and approach:
| Hosting Company | Migration Method | Sites Included | Turnaround Time | Special Features |
|---|---|---|---|---|
| WP Engine | Automated plugin or manual by their team | Unlimited for most plans | 24‑48 hours | Includes SEO and link preservation |
| Kinsta | Fully managed by their team | Unlimited | 24 hours average | Includes DNS propagation monitoring |
| SiteGround | SiteGround Migrator plugin | 1 free, then paid | Depends on site size | Plugin‑based with their assistance |
| Flywheel | Managed by their team | 1 free, then $99/site | 24‑72 hours | Includes staging site creation |
When using hosting migration services, provide complete access credentials (FTP/SFTP, database, and admin access) and communicate any special considerations like custom domains, SSL requirements, or specific server configurations.
Warning: The Plugin Compatibility Trap
Never assume migration plugins work perfectly with all other plugins. Certain security plugins (like Wordfence), caching plugins (W3 Total Cache, WP Rocket), and firewall solutions can interfere with migration processes. Always check the migration plugin’s documentation for known incompatibilities. As a best practice, deactivate security and caching plugins before migration, then reactivate them on the destination server after successful migration. For complex sites, consider creating a minimal test migration first to identify plugin conflicts before attempting the full production migration.
Post‑Migration: Testing, SEO Preservation, and Optimization
Many consider the migration complete once the site loads on the new server. This is a dangerous misconception. The post‑migration phase is equally critical and often determines long‑term success.
Comprehensive Post‑Migration Testing Protocol
Develop a systematic testing approach that covers all aspects of your site:
Functional Testing
- Front‑End Visual Inspection: Check every page template (homepage, blog archive, single post, page, custom post types) for layout breaks, missing images, or formatting issues.
- Interactive Elements: Test all forms, search functionality, comment systems, and interactive features.
- E‑Commerce Functionality (if applicable): Test product pages, cart functionality, checkout process, and payment gateways. Create test orders rather than using live transactions initially.
- User Registration & Login: Test the registration process, password reset functionality, and user profile areas.
Technical Testing
- SSL/HTTPS Verification: Ensure all resources load over HTTPS with no mixed content warnings. Use the Why No Padlock tool to identify insecure resources.
- Database Integrity Check: Use phpMyAdmin or a plugin like WP‑DBManager to check and repair database tables if needed.
- PHP Error Monitoring: Enable WordPress debugging temporarily (add
define('WP_DEBUG', true);to wp‑config.php) and check for any PHP warnings or errors. - Performance Comparison: Run the same performance tests you conducted pre‑migration. Compare metrics and ensure performance hasn’t degraded.
Cross‑Browser and Device Testing
Test your site across multiple browsers (Chrome, Firefox, Safari, Edge) and on various devices (desktop, tablet, mobile). Consider using a service like BrowserStack for comprehensive testing if you have a complex site.
SEO Preservation: Protecting Your Search Rankings
SEO preservation is arguably the most critical aspect of migration for established sites. Google’s John Mueller has stated that site moves typically take several weeks to fully process in search results.
Pre‑DNS Change SEO Checklist
- XML Sitemap Generation: Ensure your sitemap is properly configured and includes all important URLs. Use a plugin like Yoast SEO or Rank Math to generate and validate your sitemap.
- Robots.txt Verification: Check that your robots.txt file allows search engine crawling and isn’t blocking important sections.
- Structured Data Testing: Use Google’s Rich Results Test to ensure structured data (like product information, reviews, events) is properly implemented.
- Analytics Configuration: Verify Google Analytics and Google Search Console are properly configured on the new site.
Post‑Migration SEO Actions
- Google Search Console Property: Add and verify the new site in Google Search Console. Use the “Change of Address” tool if you’re changing domains.
- Submit Updated Sitemap: Submit your sitemap in the new Search Console property.
- Monitor Crawl Errors: Regularly check for 404 errors and other crawl issues in Search Console. Implement 301 redirects for any broken links.
- Performance Monitoring: Track Core Web Vitals and other performance metrics in Search Console. Address any issues that arise.
- Backlink Preservation: Ensure all internal links point to the correct URLs. For domain changes, set up proper 301 redirects for all old URLs to their new counterparts.
Performance Optimization on the New Server
Migration presents an ideal opportunity to implement performance improvements:
- Caching Implementation: Configure appropriate caching solutions. For shared hosting, plugins like WP Rocket or W3 Total Cache work well. For managed hosting, use their proprietary caching systems.
- CDN Integration: If not already using one, implement a Content Delivery Network like Cloudflare, StackPath, or your hosting provider’s CDN.
- Image Optimization: Use a plugin like ShortPixel or Imagify to optimize images, or convert them to modern formats like WebP.
- Database Optimization: Regularly optimize your database tables using a plugin like WP‑Optimize.
- Server‑Level Caching: If you have access to server configurations, implement OPcache for PHP and Redis or Memcached for object caching.
Pro Tip: The 30‑Day Monitoring Rule
Maintain enhanced monitoring for at least 30 days post‑migration. Use Uptime Robot or a similar service to monitor site availability. Check Google Analytics daily for traffic anomalies. Monitor Google Search Console for crawl errors and indexation issues. Keep error logging enabled. Many migration issues don’t surface immediately—they appear under specific conditions or after certain plugins update. This extended monitoring period catches these late‑emerging problems before they significantly impact your site.
Common Pitfalls & Expert Troubleshooting
Even with careful planning, migrations can encounter issues. Here are the most frequent problems and their solutions:
White Screen of Death (WSOD)
Symptom: Site returns completely blank white page with no error message.
Likely Cause: PHP error, memory limit exhaustion, or corrupted plugin/theme.
Solution: Enable WP_DEBUG in wp‑config.php, check error logs, deactivate all plugins via FTP (rename plugins folder), switch to default theme. Incrementally reactivate components until the culprit is identified.
Missing Images or Broken Media Links
Symptom: Images don’t appear, or file URLs still point to old domain.
Likely Cause: Hardcoded URLs in content or serialized data not properly updated.
Solution: Run a proper search‑and‑replace tool that handles serialized data (WP‑CLI, Better Search Replace). Ensure media library paths are updated. Use Velvet Blues Update URLs plugin as a fallback.
Database Connection Error
Symptom: “Error establishing a database connection” message.
Likely Cause: Incorrect database credentials in wp‑config.php, or database server unresponsive.
Solution: Double‑check database name, username, password, and host. Verify that MySQL service is running on the new server. Check that the database user has all necessary privileges.
Mixed Content Warnings (HTTPS)
Symptom: Browser shows “not secure” or padlock icon with warning.
Likely Cause: Some resources (images, scripts, stylesheets) still loaded over HTTP.
Solution: Use Really Simple SSL plugin, or manually update all URLs to HTTPS via search‑replace. Check browser console for specific mixed content errors.
Plugin or Theme Compatibility Issues
Symptom: Specific features broken after migration, especially on newer PHP version.
Likely Cause: Outdated plugin/theme not compatible with PHP 8.x.
Solution: Temporarily switch to PHP 7.4 if available, update all plugins/themes, contact plugin developers for PHP 8 patches, or find alternative plugins.
🔑 Key Takeaways
- WordPress migration involves two critical components: file system and database. Both must be transferred and reconfigured correctly.
- Triple‑backup strategy (local + cloud + hosting) is non‑negotiable for professional migrations.
- Manual migration gives maximum control but requires advanced technical skills; plugin‑based migration is the modern standard for most users.
- Serialized data is the #1 cause of broken migrations—always use tools that handle it correctly (WP‑CLI, Better Search Replace, or premium migration plugins).
- Never modify the GUID column in wp_posts—it breaks RSS feeds and search engine references.
- Post‑migration testing should cover functionality, performance, SEO, and cross‑browser compatibility.
- SEO preservation requires proper 301 redirects, Search Console verification, and sitemap resubmission.
- The 30‑day monitoring rule catches late‑emerging issues.
- Hosting‑provided migration services are often free and highly reliable for managed WordPress hosts.
- Always test the migrated site before switching DNS—use hosts file editing or temporary URLs.
Summary
WordPress site migration is a complex but manageable process when approached with proper planning, the right tools, and systematic execution. Whether you choose manual migration via FTP and phpMyAdmin, plugin‑based solutions like Duplicator or All‑in‑One WP Migration, or fully managed services from your hosting provider, the fundamental principles remain the same: backup thoroughly, verify compatibility, transfer carefully, reconfigure correctly, test exhaustively, and monitor post‑migration.
The stakes—lost data, broken functionality, tanked SEO rankings—are real, but with the expert guidance in this 2026 edition guide, you’re now equipped to execute a flawless migration. Remember that the most successful migrations are those where the end user never even knows a move happened. Your site should load faster, perform better, and remain fully functional, with all your hard‑earned search rankings intact.
Take your time, follow each phase meticulously, and never skip the testing phase. When in doubt, consult with a professional migration service—the investment is negligible compared to the cost of a failed migration. Welcome to your new hosting home.
FAQ