How To Fix WordPress Images Using Facebook Debugger
This guide will show you step-by-step how to use the Facebook Debugger tool to fix Facebook’s display of incorrect images from your WordPress website. You can easily share your content with a broad audience with just a few clicks on social media platforms, particularly Facebook, which is one of the best ways to generate a ton of traffic for your website. If your content is good, many users will be eager to share it with their followers, and this cycle will continue. If you are a business owner, Facebook enables you to interact with your audience without spending any money (unless you are promoting your content with Facebook PPC).
This makes it simple for you to identify your strengths and weaknesses. Due to the crowded nature of search engines—only 10 results are shown per page—and the prevalence of ads at the top of search results, sharing your WordPress posts on Facebook has become necessary in this era of social media.
The good news is that if you know how to use the Facebook Debugger tool, you can fix this problem rather quickly.
Identifying The Issue And Its Causes.
Prior to taking any action to address the issue with WordPress images on Facebook Debugger, you must ascertain its root cause. By doing so, you will be better able to develop a workable solution. In order to ascertain the problem’s cause, you must comprehend how Facebook gathers information from the URL posted. Facebook analyzes every link you share before retrieving all pertinent information from the page.
This process is known as caching, and it saves the information for later use. Although it depends on a few factors that you can work on to increase your chances of getting the specified images and data you want, we’ll share important tips and tricks that will help you increase your chances later in this article. Facebook will look at the content and then choose at random the image to display as a preview.
When Facebook caches your website data, it is stored on their servers and is used to preview your website whenever a user wants to view your post. When you make changes to your website, they won’t appear right away on Facebook’s servers because Facebook can take up to 30 days to update the content on their servers. As a result, even after making changes to your WordPress site for a few days, you’ll still see the same old content on your Facebook posts.
Facebook Debugger: How to Fix WordPress Images.
WordPress Yoast SEO Plugin and Facebook Debugger are two tools that can be used to fix the two issues mentioned above that are the root of the WordPress images not displaying correctly. The WordPress Yoast SEO Plugin does this by adding Open Graph Meta Tags to URL headers, but you can also tell Facebook what information to use instead of letting it decide what to display. Open Graph Meta Tags tell Facebook precisely what you’re sharing because they contain all the information it needs to display your web pages.
This information is automatically added to your headers after you install the WordPress Yoast SEO Plugin, but you can edit any content you don’t want to appear. Facebook won’t be able to scrape inappropriate content thanks to this. The Facebook Debugger tool, on the other hand, instructs Facebook to update the content that was previously stored on their server instead of instructing Facebook to scrape your website once more. Now that you know how to fix the issue, you can easily use the Facebook Debugger and Yoast SEO Plugin.
How Your WordPress Images and Links Are Displayed on Facebook (And What Can Go Wrong)
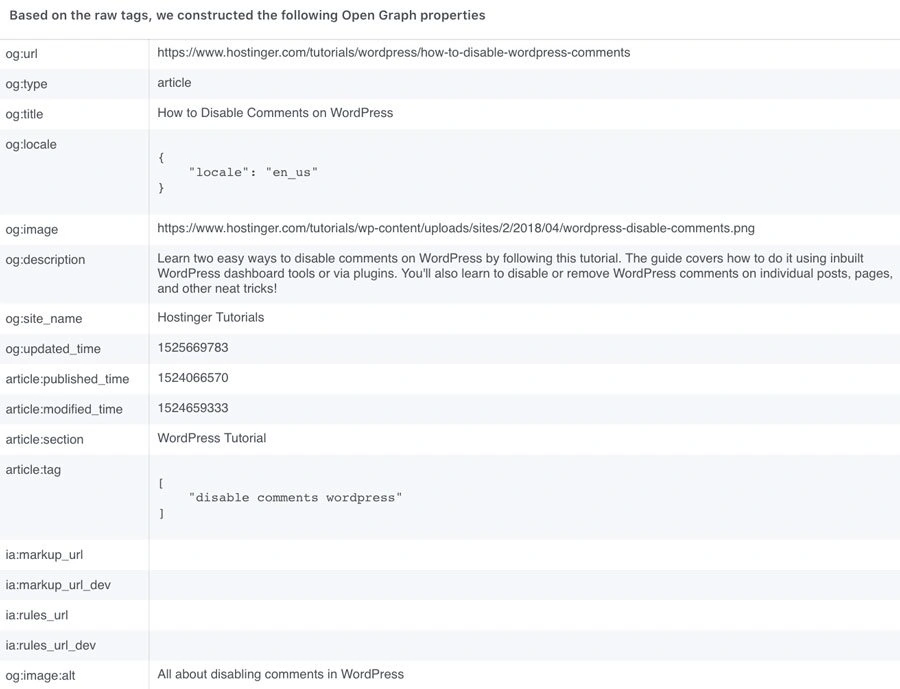
When you share your content material on Facebook, the platform tries to drag a particular set of information that tells it what to display. To do that, it makes use of components referred to as ‘open graph meta tags’, often known as ‘og tags’. Open Graph and its tags had been developed by Facebook in 2010, to assist content material creators control the best way the platform displays hyperlinks to their pages. In apply, these tags allow you to decide on which title, description, and picture should present up while you share a link from WordPress on Facebook:
Since the introduction of og tags, different social media platforms have additionally jumped on the bandwagon, together with Twitter, LinkedIn, and Google+. That degree of adoption should clue you in to the significance of those tags. If social media platforms can’t pull the information they want out of your content material, however, issues can get just a little bizarre. For instance, you would possibly often see Facebook display the fallacious featured picture while you share a post out of your WordPress website. This error – together with being annoying – can negatively influence your content material’s click-through charges. Social media generally is a huge supply of visitors, so that you need to make sure that your content material seems excellent while you share it on Facebook or different platforms. Fortunately, utilizing og tags correctly is fairly easy. All it’s a must to do is embrace them in your web page’s HTML. Here’s what they should seem like:
<!– Open Graph knowledge –>
<meta property=”og:locale” content material=”en_US” />
<meta property=”og:type” content material=”article” />
<meta property=”og:title” content material=”How to Disable Comments on WordPress” />
<meta property=”og:description” content material=”Learn two easy ways to disable comments on WordPress by following this tutorial. The guide covers how to do it using inbuilt WordPress dashboard tools or via plugins. You’ll also learn to disable or remove WordPress comments on individual posts, pages, and other neat tricks!” />
<meta property=”og:url” content material=”/tutorials/wordpress/how-to-disable-wordpress-comments” />
<meta property=”og:site_name” content material=”Hostinger Tutorials” />
<meta property=”article:tag” content material=”disable comments wordpress” />
<meta property=”article:section” content material=”WordPress Tutorial” />
<meta property=”article:published_time” content material=”2018-04-18T15:49:30+00:00″ />
<meta property=”article:modified_time” content material=”2018-04-25T12:28:53+00:00″ />
<meta property=”og:updated_time” content material=”2018-04-25T12:28:53+00:00″ />
<meta property=”og:image” content material=”/tutorials/wp-content/uploads/sites/2/2018/04/wordpress-disable-comments.png” />
<meta property=”og:image:secure_url” content material=”/tutorials/wp-content/uploads/sites/2/2018/04/wordpress-disable-comments.png” />
<meta property=”og:image:width” content material=”900″ />
<meta property=”og:image:height” content material=”560″ />
Most of these tags are self-explanatory. All it’s a must to do is about your personal title, URL, meta description, and related picture the place indicated. Using og tags, you’ll be able to control each facet of how your content material seems to be on Facebook. That means you’ll be able to even A/B test variants to see which of them carry out higher, and use that information to optimize your click-through charges. Of course, that only works if the platform displays your content material appropriately. If your Facebook photos are usually not exhibiting up correctly, you’ll must do some troubleshooting. That’s the place the Facebook Debugger tool is available in.
An Introduction to the Facebook Debugger Tool
The Facebook Open Graph Debugger helps you analyze your pages to see if there are any errors in the best way they deal with og tags. You may also use it to preview how your hyperlinks will seem on Facebook while you share them, as on this instance.
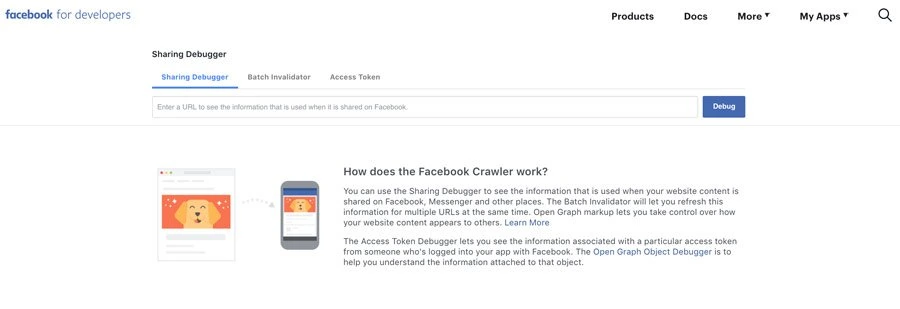
You don’t even want to enroll in a particular account to make use of the Facebook Debugger. However, you do must have a Facebook account to make use of it. All it’s a must to do is go to the web site, and type within the hyperlink for the web page you need to analyze. Then hit the Debug button, and the Facebook debug tool will return a full evaluation. The very first thing you’ll see is a notification if the service finds an og tag lacking:
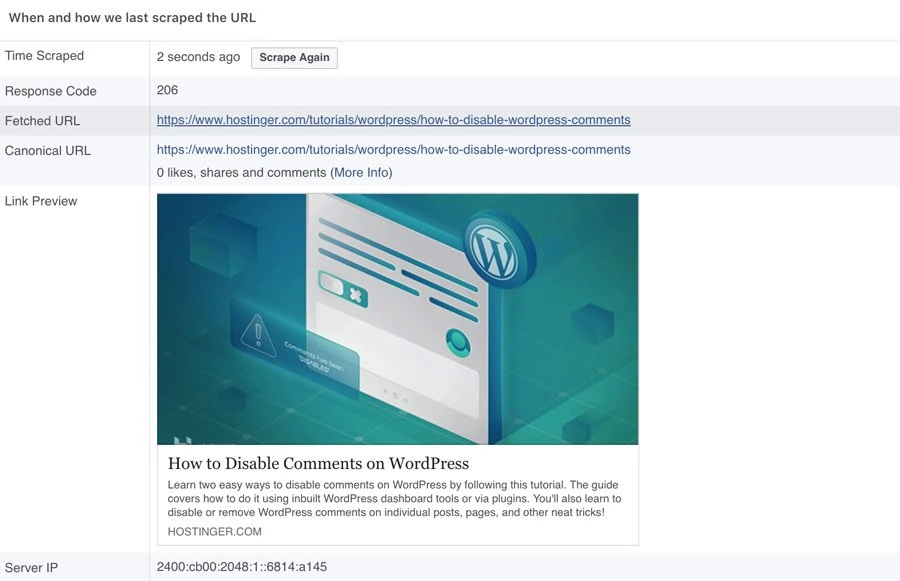
Below that, you’ll discover information in regards to the final time Facebook accessed or ‘scraped’ the hyperlink you entered. This part additionally contains information on the web page’s canonical URL, and any redirects Facebook encountered:
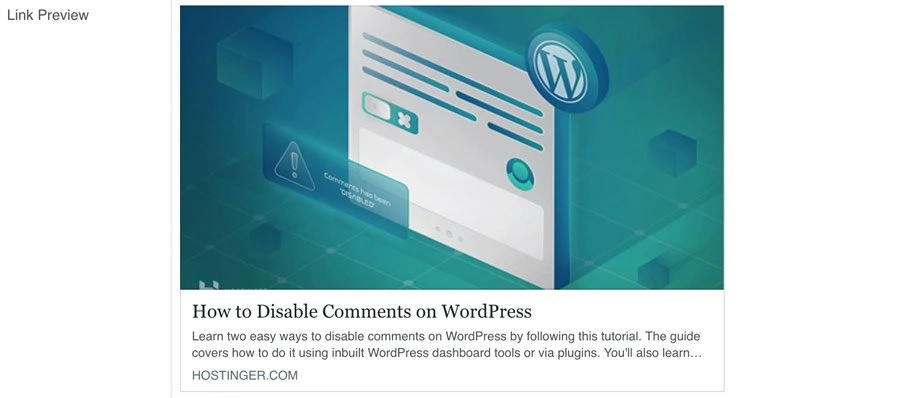
More importantly, you’ll additionally see a full preview of how Facebook will interpret the URL when you share it on the platform. If there are any errors together with your featured picture, for instance, you’ll see them right here:
If you need to be further cautious, you’ll be able to check all of your content material utilizing the Facebook URL debugger earlier than you share it. However, that’s an inefficient strategy. Instead, you should look to optimize your content material’s og tags to keep away from errors within the first place. Before we discuss tips on how to make that occur, scroll additional down your report back to see a full breakdown of all of the og tags on the web page you selected to investigate:
Ideally, what you see right here should be the identical title, meta description, URL, and pictures you set in WordPress. If these are usually not the values that seem right here, you would possibly need to use a dedicated tool to verify your tags are arrange appropriately. Let’s discuss how to do this.
Fix the ‘properties are not yet available’ Image Warning
Also, simply because we ignored the warnings above doesn’t imply they don’t seem to be all the time helpful. In truth, there are beneficial sizes in terms of photos that you just should be utilizing. Otherwise, your picture won’t present up in any respect (as seen below on this warning):
Struggling with downtime and WordPress issues? Kinsta is the hosting resolution designed to avoid wasting you time! Check out our features
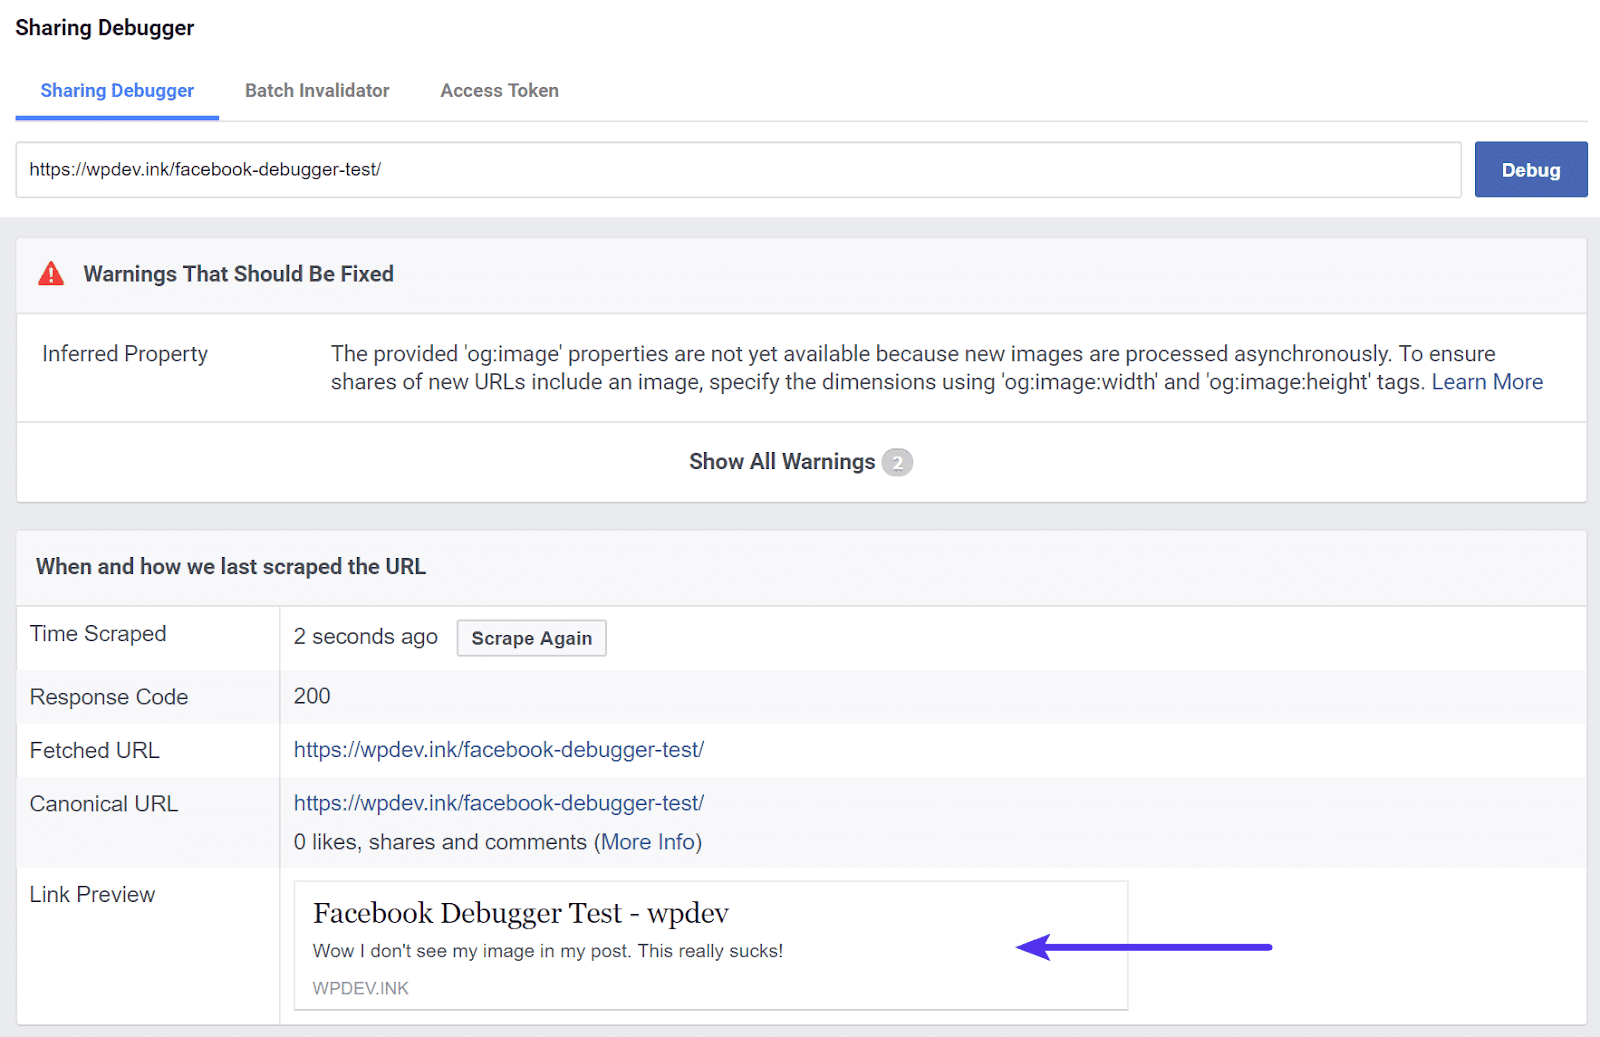
Facebook Debugger – picture too small The offered ‘og:image’ properties are usually not but accessible as a result of new photos are processed asynchronously. To guarantee shares of latest URLs embrace a picture, specify the scale utilizing ‘og:image:width’ and ‘og:image:height’ tags. This warning occurred as a result of our picture was too small. The minimal picture measurement Facebook requires is 200 x 200 pixels. Usually the larger the higher in terms of Facebook images. In common, 1,200 x 630 pixels appears to work best for most individuals.
You could make a picture greater than this, however Facebook will crop it. When you’re figuring out your picture measurement, hold this facet ratio in thoughts. If you’re utilizing a plugin like Yoast SEO, it’s additionally beneficial to manually set the picture. Your featured photos in your WordPress theme could also be a special facet ratio or measurement. Perhaps you don’t even use featured photos! In this case, the Yoast search engine marketing plugin permits you to manually add a differently-sized picture only for Facebook. You’ll merely want to seek out the Yoast search engine marketing social settings for a post and add a brand new Facebook picture: 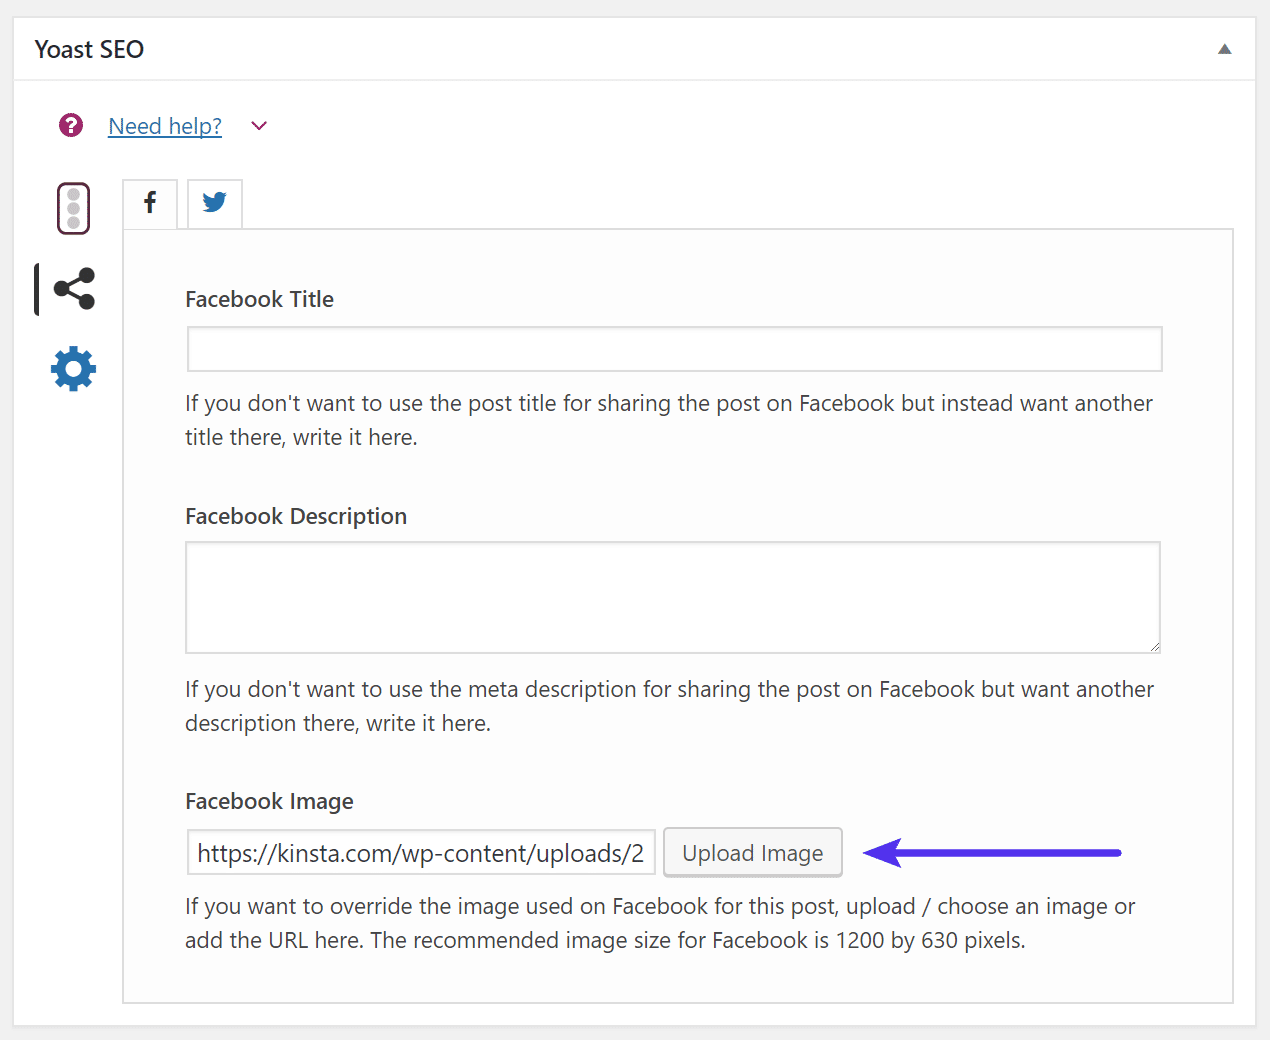 Yoast search engine marketing Facebook social field Once you add a picture sized appropriately, it’s going to populate the Open Graph Meta Tags that Facebook is in search of. Additionally, you’ll be able to proceed to manually set the title and outline if wanted.
Add the fb:app_id Property
You may also see a warning a few lacking Facebook App ID. It’s vital to notice that this doesn’t intervene with the flexibility to share posts on Facebook in any manner. Quite a lot of occasions this could merely be ignored, nevertheless it does restrict your means to make use of Facebook Insights knowledge:

Missing Properties If you need this extra Insights knowledge, then it’s essential to add your Facebook App ID to your website. First, create your Facebook app. Then, copy your Facebook App ID from the app dashboard. Once you arrange a live Facebook app, you’ll be able to add a meta tag for it to your website. Although Yoast search engine marketing used to help this course of, it just lately eliminated this performance. As an alternate, set up the free Meta Tag Manager plugin:
Facebook Debugger to Fix WordPress Images
Whenever somebody makes use of a social share button or copies and pastes a hyperlink to your web page, Facebook will crawl the HTML of your web site. Then, it generates a thumbnail picture, title, and outline primarily based on this information. Here are some common necessities your website should observe to make sure this course of runs easily:
- Gzip and deflate encoding in your server
- List open graph properties throughout the 1 MB of your HTML
- Limit web page loading time to some seconds
- Add the crawler’s consumer agent strings or IP addresses to your website’s enable list
- Ensure your privateness coverage is crawlable
How To Use Facebook’s Sharing Debugger to Fix WordPress Images
Any platform or tool can have issues or quirks that it’s a must to work round. The Facebook Sharing Debugger tool was created that can assist you clear up points together with your Open Graph Meta Tags, as well as troubleshoot caching. You can discover the Sharing Debugger on the Meta for Developers website under Tools. To crawl a post, merely enter the URL and click on on Debug.
Step 1: Clear the WordPress Cache for That URL
To guarantee Facebook grabs the newest information about your post, you’ll must clear the cache in WordPress. If the outdated picture continues to be cached in your website, the Sharing Debugger isn’t going to have the ability to assist repair your drawback as it’s going to merely re-fetch the cached information. With Kinsta server-level caching, each time a post is up to date, the cache for that web page or post is cleared routinely. If you’re utilizing a special caching resolution or third-party plugin, you’ll need to look into their documentation to make sure you understand how to clear your cache.
If all else fails, you’ll be able to all the time clear the cache in your total WordPress website. However, remember that your website should rebuild the cache, which may degrade your website speed.
If you determine it’s essential, open MyKinsta, navigate to your WordPress website then click on Tools. Here, click on on Clear cache.
Step 2: Scrape Again within the Sharing Debugger
Now that the cache is cleared for the post or web page in query, we’ll must scrape it once more within the Facebook Debugger tool.
To do that, click on on the Scrape Again button.
You would possibly encounter warnings that aren’t all the time probably the most correct.
So that is after we hit the Scrape Again button for a second time.
Yes, it would sound odd. But lots of occasions you would possibly must scrape twice. After this, you’ll see that it’s now pulling the brand new featured picture with the brand new file identify because the og:picture attribute
Improper ‘og tags’ is likely one of the main causes for Debugger to indicate inaccurate information out of your WordPress website. Changing the picture and accompanying textual content normally helps resolve the difficulty. As we talked about earlier than, the tags will be up to date by way of the web page’s HTML or through the use of plugins that neatly implement the code in your behalf. You may also select the official Facebook plugin to deal with the Open Graph Tags to your social media community.
Step #2 – Refresh the Cache
Caching plugins are a well-liked add-on for WordPress website as they considerably enhance the location’s efficiency. However, Facebook usually misunderstands the caches in your web web page and pulls tags from the previous variations as a substitute of the newest cache. Facebook may grab a cache that doesn’t have the ‘og tag’ up to date, or you’ve gotten modified its featured picture, leading to inaccurate content material.
To clear up this concern, clear the cache of your WordPress website. Most WordPress plugins for caching have the choice to clear the cache proper from the WordPress editor. But make sure that to recheck the documentation for the particular plugin you’re utilizing because the setting varies for every. If you proceed to face points, you’ll be able to clear the cache of your full WordPress website. However, I normally don’t advise this methodology as refreshing the complete web site will influence your website’s load time.
Step #3 – Scrape Again
Now that you’ve got modified your web site’s tags and cleared the cache, it’s time to once more return to the Debugger tool and conduct an inspection. Enter the URL and click on on the ‘Scrape Again’ button. Most possible, this may present you correct information across the content material. In some conditions, it’s possible you’ll must scrape twice if the post shouldn’t be up to date with the adjustments you made to your Facebook posts.

Ultimately, this might resolve the difficulty you had been going through with post photos and hyperlinks. If it doesn’t, return from step one and repeat the troubleshooting strategies. Here, you should additionally word that utilizing the Debugger tool is not going to have an effect on the beforehand shared posts on Facebook. And any adjustments you make to the tags and pictures will only apply to future hyperlinks.
