How to Justify Text in WordPress
In Word, Word Editor, and Google Docs, aligning text just requires the click of a single button. WordPress used to be just as straightforward. But since the introduction of version 4.7, WordPress has eliminated the text-justification option. The button that swiftly justified text has been removed since that release. This is because text justification in various web browsers can be challenging.
A text that is nicely justified in one browser won’t appear the same in another browser or on a screen of a different size. WordPress deleted this button from its toolbar as a result of the responsiveness problem. However, it is still doable if you use a few methods. This short tutorial will demonstrate text justification in WordPress.
What is Justified Text
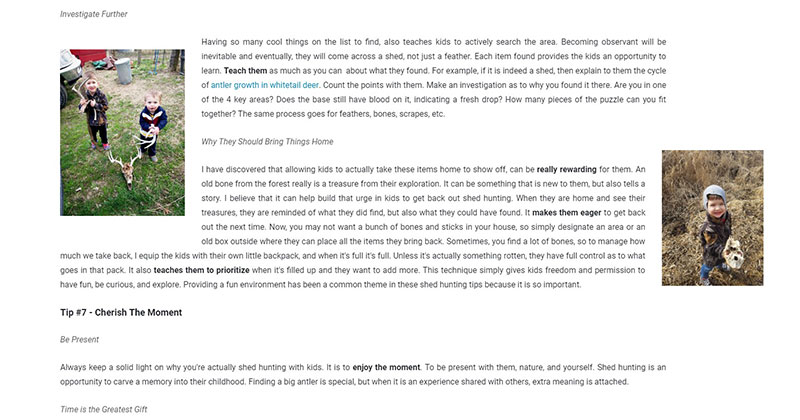 Text that is justified has its margins aligned on the column’s left and right sides. The outcome is a post’s or page’s clean appearance on both sides. The software creates gaps between words as necessary to achieve this alignment. This necessitates changing the word spacing to match the font’s specifications. This won’t be a problem when sentences are long enough.
Others dislike text justification, while some individuals prefer it. It is a personal choice, and it is not regarded as a mark of professionalism. As an illustration, some prestigious American publications and periodicals rationalise, while others solely align to the left. Text justification is frequently used in books. Justification has the benefit of adding a visual element of clarity. It sets boundaries for the ends of blocks of text. As a consequence, blogs and posts seem professional. The procedures to follow in order to justify text in WordPress are listed below. Let’s look at the simple strategy first.
Justify Text Using Simple Shortcut Keys

Following are the steps to justify the text in the WordPress editor window:
- Log in to your WordPress website.
- Select the text which you want to justify.
- Use the Following keyboard shortcut:
- For Windows: Ctrl + Alt + J
- For Mac: Ctrl + Option + J
Now, the chosen text is justified. This is the simple WordPress method for text justification. This technique typically operates without any issues. This strategy doesn’t always work. Using a text-justifying plugin is an alternative.
Install a Suitable Plugin
WordPress plugins are useful for automating some processes. Some people use WordPress to post frequently, and plugins help to standardise the appearance of all the entries. The plugin just has to be installed and activated once to take over several repetitive chores. Additionally, plugins that make text alterations like justification are accessible. Here are four plugins that accomplish that:
With WordPress 4.7 and later versions, this plugin adds the justify button back to the WYSIWYG interface. It’s crucial to utilise the Classic Editor for this and not the Block Editor.
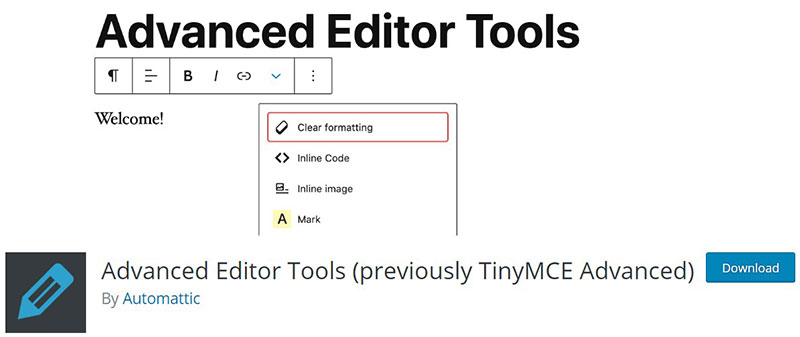
Advanced Editor Tools (previously TinyMCE Advanced)
The WordPress Editor now has a variety of more sophisticated formatting tools and styles. After installation, users can add additional toolbar buttons, such as a Justify button.
It functions similarly to the first two plugins. It upgrades the WordPress editor’s toolbar to include a justify button. This will show up in the button row’s second column.
This plugin’s name pretty much tells it all. It adds numerous other buttons to the post editor in addition to the Justify button. For instance, the underline button is also included. For individuals that require more styling options than the WordPress editor provides, this is a good solution. These four options are the only ones for plugins. Many more people perform comparable or same actions. The four mentioned above have all been tried and are excellent. The plugin creators never stop enhancing and updating their creations. Therefore, it is a given that they will continue to support updated WordPress versions.
Justify Text in WordPress Manually
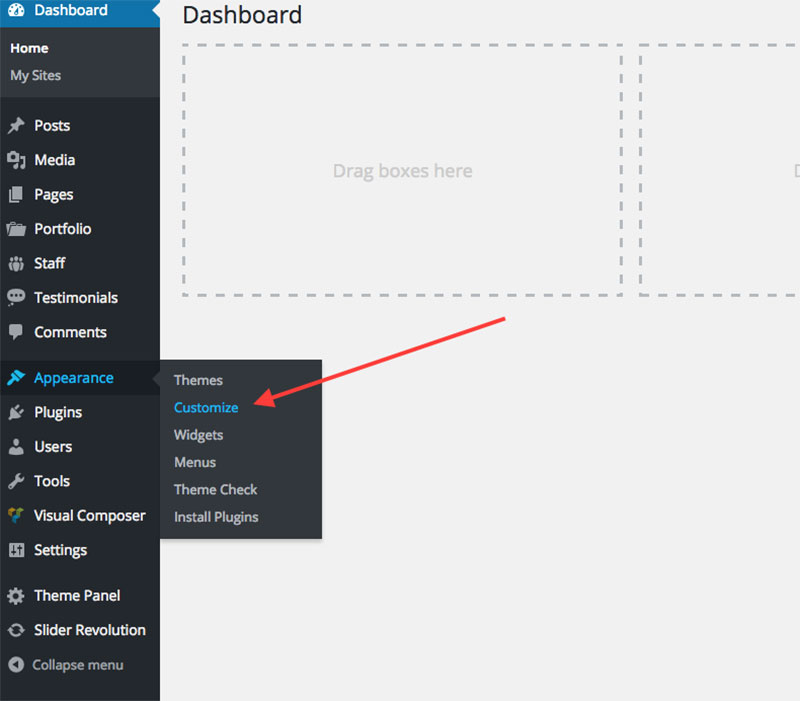
The alternative way for justifying text in WordPress is covered in this section. This process is a little more difficult. It is only appropriate for those with more WordPress experience. A level at least of intermediate is needed. The process is as follows:
- Log in to the WordPress blog.
- Go to the WordPress dashboard Main Page.
- Hover over Appearance Menu.
- Click Customize. In the following window, the themes appear with their Additional CSS option at the end of the menu.

- Click on the Additional CSS option.
- Add the following string of code in the window.
justify-text { text-align: justify; }
- Click on Save and Publish. After saving and publishing the CSS is applied to the active theme.
- Go back to the WordPress dashboard Window.
- Open the Post or start a new one.
- Select the piece of text that needs to justifying in the center.
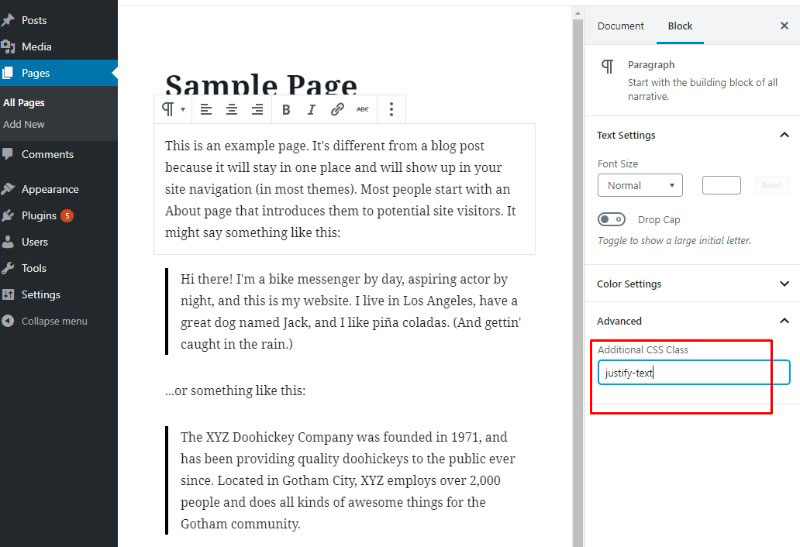
- Go to the Advanced tab in the Block panel on the right side of the window.
- Go to the Additional CSS Classes in the menu item
- Type ‘justify-text‘ in the empty text box to apply this attribute to the selected post text in the window.
- Click the Update button.
The CSS Justify properties will now be applied to the selected text. In actuality, it’s not that tough to do. But it will be challenging for individuals with little WordPress knowledge to follow the instructions.
How to Justify Text in Gutenberg?
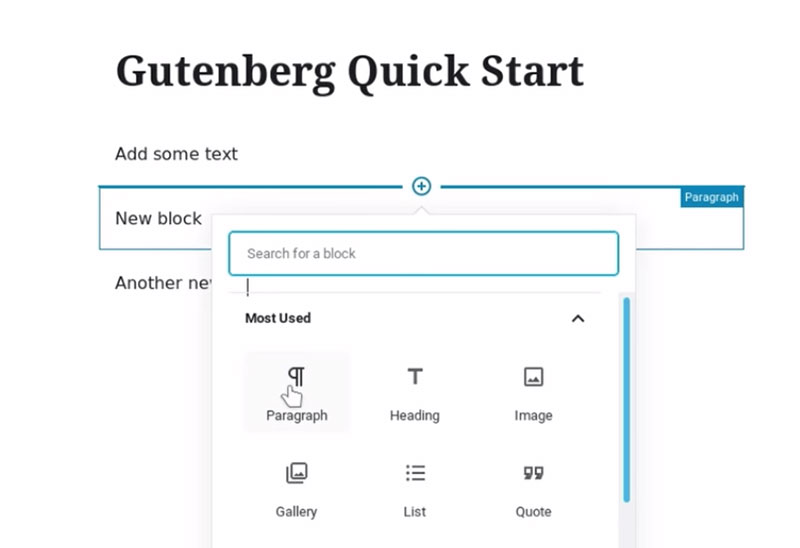
Text editors include Gutenberg. Although it is a tremendously sophisticated piece of software that can perform practically everything, many people dislike using it. It simply takes a little while to become accustomed to. Many of the duties that plugins perform can be replaced by it. Additionally, Gutenberg makes it simple to align text:
- Add a text block icon.
- Go to the block settings menu.
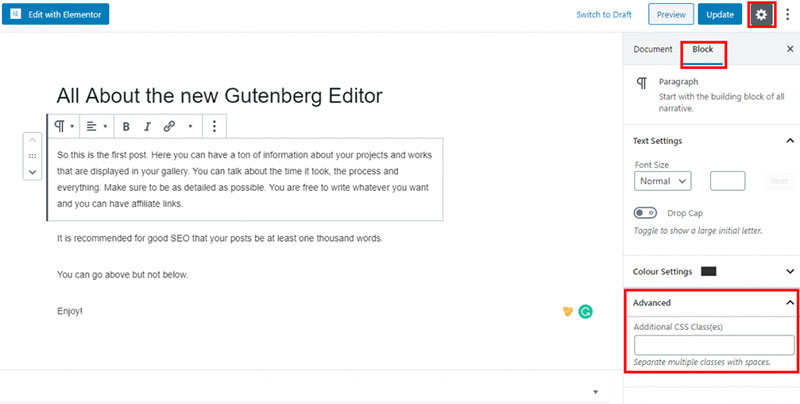
- Under the Advanced section add the code to the CSS block.
p.justify { text-align: justify; }
- Save the post.
- Check by viewing or previewing.
With this method, any new text created in WordPress is justified centrally.
Justify Text in WordPress Using Plugin
Just install and activate this WordPress plugin and you will see the Justify text button added to your toolbar.
TinyMCE Advanced Plugin
You may add sophisticated formatting and styles to your WordPress editor with the fantastic TinyMCE Advanced Plugin. Once the plugin has been installed and turned on, you may modify the toolbar to include the Justify button.
Justify Text in WordPress Using CSS
Simply switch to the HTML editor and enter the following code to justify the text using CSS.
<p style=”text-align: justify;”> This text will be justified </p>
What is Justified Text?
As you are probably aware, justifying text aligns content to both the left and right margins while adding extra space between words as needed. This creates a neat, organised appearance on the left and right sides of the article or page. When text is justified, its layout creates distinct boundaries on the left and right sides of the text.
How To Justify Text In WordPress? (Manually and with Plugin)
Users of WordPress could justify text just as simply as they did in any other Word Editor, such as Microsoft Word or Google Docs. But with WordPress v4.7, everything was different because the option was eliminated because of how inconsistently the content was implemented in the browsers. However, you may still use this straightforward instruction to justify text on your WordPress website:
How To Justify Text in WordPress?
The tutorial assumes you are using the Gutenberg editor and WordPress 5.1 or higher. For the task, we must install and enable two separate plugins:
Once done, go to to your WordPress Dashboard > Settings > Writing.
You’ll see a new selection option here that allows you to choose between the Block Editor and the Classic Editor. Go to edit an existing post or start a new one by selecting the Classic Editor. You’ll see that the Classic editor has taken the place of the Gutenberg editor and that the Justify Text button is still present.
Now, if you are completely new to WordPress and have no prior knowledge of how to navigate the CMS or install plugins, we advise that you look at the detailed guide below. Here, we’ve covered a detailed, step-by-step tutorial for justifying text in WordPress.
An In-Depth Guide On How To Justify Text in WordPress
Step 1: Go to WordPress Dashboard > Plugins > Add New.
You should see the following plugin if you type Classic Editor into the search bar.
To integrate the Classic Editor into your WordPress website, click Install and then Activate. You’ll arrive at the Installed Plugins tab after doing this. Re-enter the Add New Plugins interface now. Enter Justify Text in the search box at this point.
As you can see, WordPress has a tonne of plugins that can assist you with text justification.
However, we will be using the Re-Add Text Justify Button for the duration of this tutorial. Once you’ve pressed Install and Activate, go to the next step.
Step 2: Navigate to after installing both plugins to WordPress Dashboard > Settings > Writing.
Two new settings have been added to the Classic Editor plugin, as seen in the image above. Make the Classic Editor everyone’s default editor, replacing the Gutenberg editor.
Step 3: Go to the page or post you wish to modify the text alignment on to justify. In this tutorial, we’ll adjust the Sample Page’s text alignment.
As you can see, the Justify Text button has been reinstated and we are now using the Classic WordPress Editor.
How Do I Align Text And Images In WordPress?
Once you get used to it, aligning texts and images in WordPress can be a real pain. To get acclimated to it, you might need to enter and play about there for a while. You can choose the image’s size and the alignment (left, centre, or right) when you select the image. Once the image is in the desired location, highlight the text surrounding it so that it can be aligned to the opposite side. In the article, that is how you make a picture and text appear on the same line. We aim to keep graphics and text spread out above and below each other on our websites instead of truly using this option. Or, we employ a gallery.
How to Justify Text in WordPress

Anyone who writes essays, e-books, traditionally published books, or who has a literary-focused website, whether it runs on WordPress or not, is familiar with the practise of justifying text. This is not a common approach, though, mostly because it can obliterate visibility on mobile devices. Users of this Content Management System (CMS) have noted that the “Justify Text” button has been removed since WordPress 4.7 for a number of reasons, including this. Even worse, they did it on purpose, and it’s highly unlikely to happen again. Fortunately, there are still methods you can learn to use in WordPress to justify text.
Conclusion
Now that we have gone through the procedures, be sure you want to accomplish this with your web page. Justifying your language might be a wonderful idea in some situations. If you are writing an essay, novel, or other lengthy project online, etc. Your text should probably be justified. You probably shouldn’t be looking to do it elsewhere. When you write longer posts and your viewers are searching for a specific example, it can be difficult for them to browse through your website. Although the brief paragraphs on newspaper websites do also employ justified text, this is only because it is a typical editorial style of writing. Simply put, install a plugin to see

