Create Unlimited Polls On WordPress (It’s Free)
If you want to create polls for your WordPress website, you came to the right place. You can create unlimited polls and it’s totally free.
Polls can be very powerful. With it, you can collect different data and create a case study. Also, it’s fun and a great way to engage your audience.
And to create a poll on a WordPress website, is very easy, costs nothing, and you can create as many polls as you want. You can display them on any page or blog post.
What makes a good WordPress poll plugin?
A good WordPress poll plugin should indeed provide several essential features to make the process of creating and managing polls as straightforward as possible. Here are the key features that make a WordPress poll plugin effective:
Easy Poll Builder: The ability to create polls without needing to write any code is crucial. Users should be able to create polls through an intuitive, user-friendly interface. The poll builder should allow for various question types, answer options, and customization without a steep learning curve.
Shortcode Generator or Page Builder Integration: The plugin should offer a shortcode generator that automatically creates shortcodes for each poll. This allows users to easily embed polls in various locations on their website, such as sidebars, blog posts, pages, and footers. If it doesn’t provide shortcodes, it should seamlessly integrate with popular page builders like Elementor or Divi, making poll integration a breeze.
Poll Results Dashboard: A robust poll plugin should provide a comprehensive dashboard for tracking and analyzing poll results. This dashboard should include:
Entry Tracker: It should display all poll entries and provide notifications when new entries are submitted. This feature helps users stay updated on the latest responses.
Charts and Graphs: The plugin should offer visual representations of poll results, including charts and graphs. These visuals make it easy to understand the distribution of responses across your target audience. Common chart types include bar charts, pie charts, and line graphs.
Customization Options: A good poll plugin should allow for customization of the poll’s appearance to match the website’s design. This includes options for choosing colors, fonts, and styles to ensure the poll seamlessly integrates with the site’s aesthetic.
Mobile Responsiveness: The plugin should ensure that the polls look and function well on both desktop and mobile devices. Mobile responsiveness is vital as an increasing number of users access websites from smartphones and tablets.
User Engagement Features: To increase user engagement, the plugin should offer features like the ability to set start and end dates for polls, schedule them, and offer incentives for participation, such as displaying poll results after submission or offering discounts or giveaways to participants.
Data Export and Integration: Users should be able to export poll data for further analysis. Integration with popular email marketing platforms and customer relationship management (CRM) systems can also be beneficial for collecting user data.
Security and Spam Protection: Ensure that the plugin has mechanisms in place to prevent spam submissions and protect user data. Features like CAPTCHA integration can be valuable for security.
Customer Support and Updates: Look for a plugin with a responsive support team and a track record of regular updates to ensure ongoing compatibility with the latest WordPress versions.
Compatibility: Ensure that the plugin is compatible with your specific WordPress version and any other plugins or themes you’re using on your site.
What Do You Need To Create Polls
In order to create and display polls on your website, you need only one thing – a plugin to build a poll. And that plugin in Forminator.
Forminator is a premium WordPress plugin from WPMU DEV but it has a free version with a lot of features that are enough for most people. But for more features, you can always upgrade to a pro version.
Also Read: Create Contact Form With Forminator
Actually, Forminator is a contact form plugin with awesome features and a very easy-to-use user interface. But it also has a feature for polls and quizzes.
Create Polls With Forminator
In this tutorial, I will explain how to install the plugin, how to create a poll and add different sections, features, or options in 7 simple steps.
So, let’s dive in and create beautiful polls for your website.
Step 1: Install & Activate Forminator
First of all, we need to install the plugin from the plugin repository.
From your WordPress dashboard, go to Plugins > Add New and search for Forminator. Install and activate the plugin.

After activation, you will see the new section for the Forminator plugin on the left side of your WordPress dashboard. Go to the Dashboard and from here you can create either a contact form, poll, or quiz.
Step 2: Create A Poll
From the Forminator Dashboard, click the Create button in a poll section, give your poll a name and click another Create button.

Now, you will be redirected to the polls creation interface. On the left side, there are different sections like Details, Appearance, etc. We will cover each of them.
Also, on the top right corner there are three buttons:
- Save Draft – allows you to save draft while building polls
- Preview – you can preview your progress.
- Publish – after you create a poll, you can publish it.
Step 3: Create Question & Answers
Polls building blocks are question and answer and we create them in the Details section.
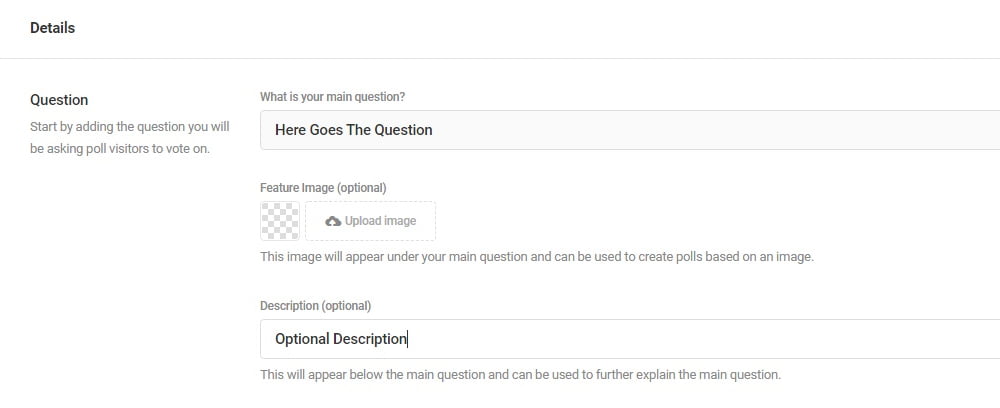
In the Question input, type your question, and also you can add a featured image and a description. They are optional.

Below that, in the Answers section, you can add unlimited answers to your question by clicking the Add Answer button.

And lastly, input the submit button text like Vote, Submit, or anything you want.
Now, save it as a draft and continue to the next step.
Step 4: Design Your Poll
Go to the Appearance section and from here you can add a custom design to your poll. You can change the style, colors, and more.
Forminator has four different design styles – Default, Flat, Bold, and Material. Choose which style you like the most.

Then add custom colors to your poll. You can change the color of almost every element of a poll such as a container, radio, button, success or error messages, etc.
Don’t forget that you can always preview your changes with the Preview buttons. This way it’s easier to see the changes.
Step 5: Change Polls Behavior
After you complete the styling of your poll, go to the Behaviour section and from here you can choose different settings.
First, you can choose the display style of the results. You can choose between a pie chart and a bar graph. Also, you can totally hide the results or show them after submission.

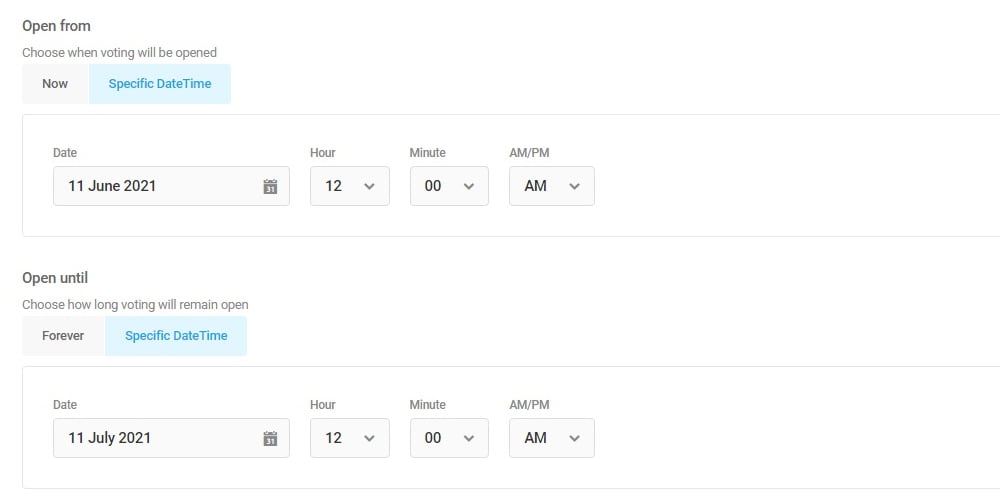
Another important setting here is Vote Opening and Vote Limit. For example, you want your poll to be active for 7 days. You can do it from the Vote Opening section.
Also Read: Best Free Gutenberg Plugins
Pick start date in Open From section and end date in Open Until section. Your poll will be active in that range.

And from the Vote Limit section, you can choose how many votes one user can submit. You can use IP or Cookie to identify the same user.
Also, from the Rendering section, you can change different settings like AJAX loading and page caching.
Step 6: Optional Features
There are some optional features you can use such as email notifications and integrations.
If you want to receive an email on every submission, go to Notifications, turn on the feature and input the recipient email where you want to receive emails.

Now if you want to use some third-party apps, go to Forminator > Integrations and connect to one of the apps.
Forminator integration works with apps such as:
- FortressDB
- MailChimp
- Google Sheets
- HubSpot
- Slack
- Trello
- Campaign Monitor
- AWeber
- Active Campaign
When you connect to one of the apps, then you can go to your polls, and from the Integrations section use that app with your poll.
And the last optional feature is in Settings. From here you can disable submission storage in the database and how long you want to retain submissions or IPs.
Step 7: Publish & Use Your Poll
After you complete all the steps and create your custom poll, check the preview and if you like the result, click the Publish button.
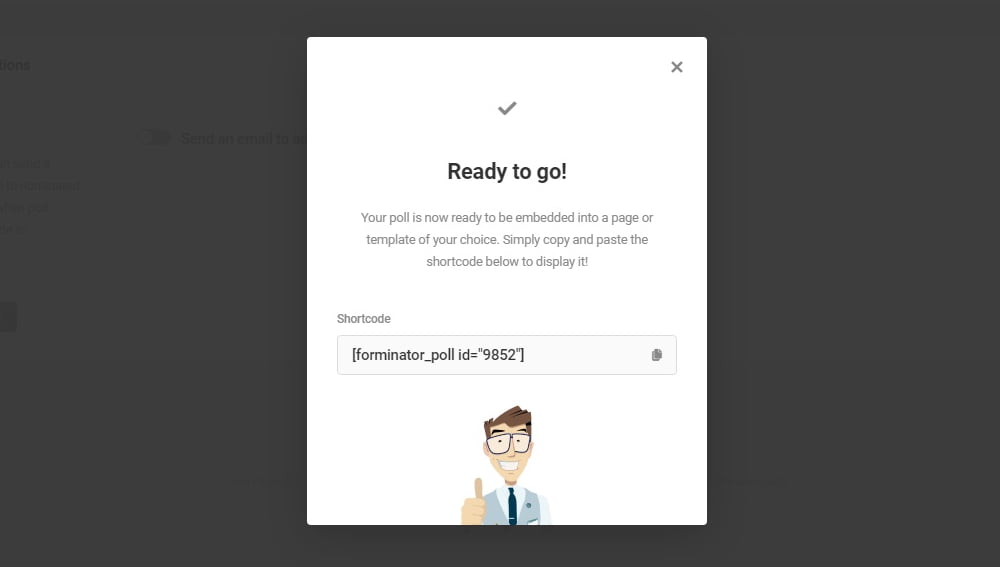
After publishing it, you will get a shortcode of your poll and you can insert that on any page or post you want and it will display it immediately.

Now you have a fully functional poll that can be displayed on your website and you can start collecting data.
Of course, you can always edit your polls and change any settings. Just go to Forminator > Polls. Here will be the list of all of your polls and on the right side, there is the Edit button. Click it and change anything you like, then click Update and it will be updated automatically.
Also, next to the Edit button there is a gear icon. From there you can do different things like copy shortcode, unpublish poll, view submissions, duplicate it, export, etc.
Wrap Up – Create Unlimited Polls On WordPress
Now you know how to create custom polls on WordPress websites with the Forminator plugin. All this is done with the free version and it allows you to create an unlimited number of polls, quizzes, or contact forms.
If you want more options and features from Forminator, you can always upgrade to a pro version and create even more beautiful and powerful polls.


nice article keep sharing
http://www.pakistanjobs.pk/online-jobs/
Wow. I struggled for polls and what a great plugin it is. I have to strat using it. great guide.
Thanks keep reading and sharing